Practice your LMS Setup on a UTM Virtual Machine
If you want to practice your LMS software installation on a "blank" computer, you can run a VM instance. In this tutorial, we will introduce the UTM Virtual Machine platform for MacOS.
Introduction
"Why use a Virtual Machine?"
Using virtualization software for teaching software installation procedures offers several advantages. Firstly, it provides a controlled and isolated environment for students to practice without affecting their primary operating system or risking damage to their personal computers. This allows for experimentation and hands-on learning without the fear of making irreversible changes. Secondly, virtualization software enables instructors to create pre-configured virtual machines with specific software setups, ensuring consistency and eliminating the need for students to individually install software on their own machines. This saves time and reduces potential compatibility issues. Additionally, virtualization software allows for easy sharing and distribution of virtual machine images, facilitating remote learning and collaboration among students. Overall, virtualization software enhances the teaching and learning experience by providing a safe, convenient, and efficient platform for practicing software installation procedures.
"Why UTM?"
UTM runs QEMU (Quick Emulator), which offers several advantages over other virtualization software like VMware or VirtualBox. Firstly, QEMU is an open-source emulator that supports a wide range of guest operating systems and architectures, providing flexibility and compatibility for various use cases. Unlike VMware or VirtualBox, which primarily focus on x86-based virtualization, QEMU can emulate different processor architectures such as ARM, MIPS, PowerPC, and more. This versatility makes QEMU well-suited for development, testing, and emulation of embedded systems and specialized environments. Additionally, QEMU provides advanced features like full system emulation, hardware acceleration through KVM (Kernel-based Virtual Machine), and support for live migration, making it a powerful tool for virtualization in both development and production environments. Moreover, being open-source, QEMU allows for greater customization and community-driven development, enabling users to tailor the software to their specific needs and contribute to its ongoing improvement. Overall, QEMU stands out for its versatility, performance, and extensibility compared to other virtualization software options.
Prerequisites
- A host machine running MacOS
- A host machine with at least 4GB RAM and at least 32GB of free storage.
Installation Instructions
1. Free Up Resources on Your Host Machine
For this tutorial, we are installing a guest instance of Ubuntu Server. However, we need to make sure we have more resources (RAM, storage) than are called for in the official minimum instalation requirements for Ubuntu Server. Ulimately, we used the default RAM setting in UTM of 4096MB (~4GB) and 32GB of storage. We had problems with the install when only meeting the minimum requirements.
2. Download UTM from App Store
You can download UTM from the App Store on macOS -- easy!
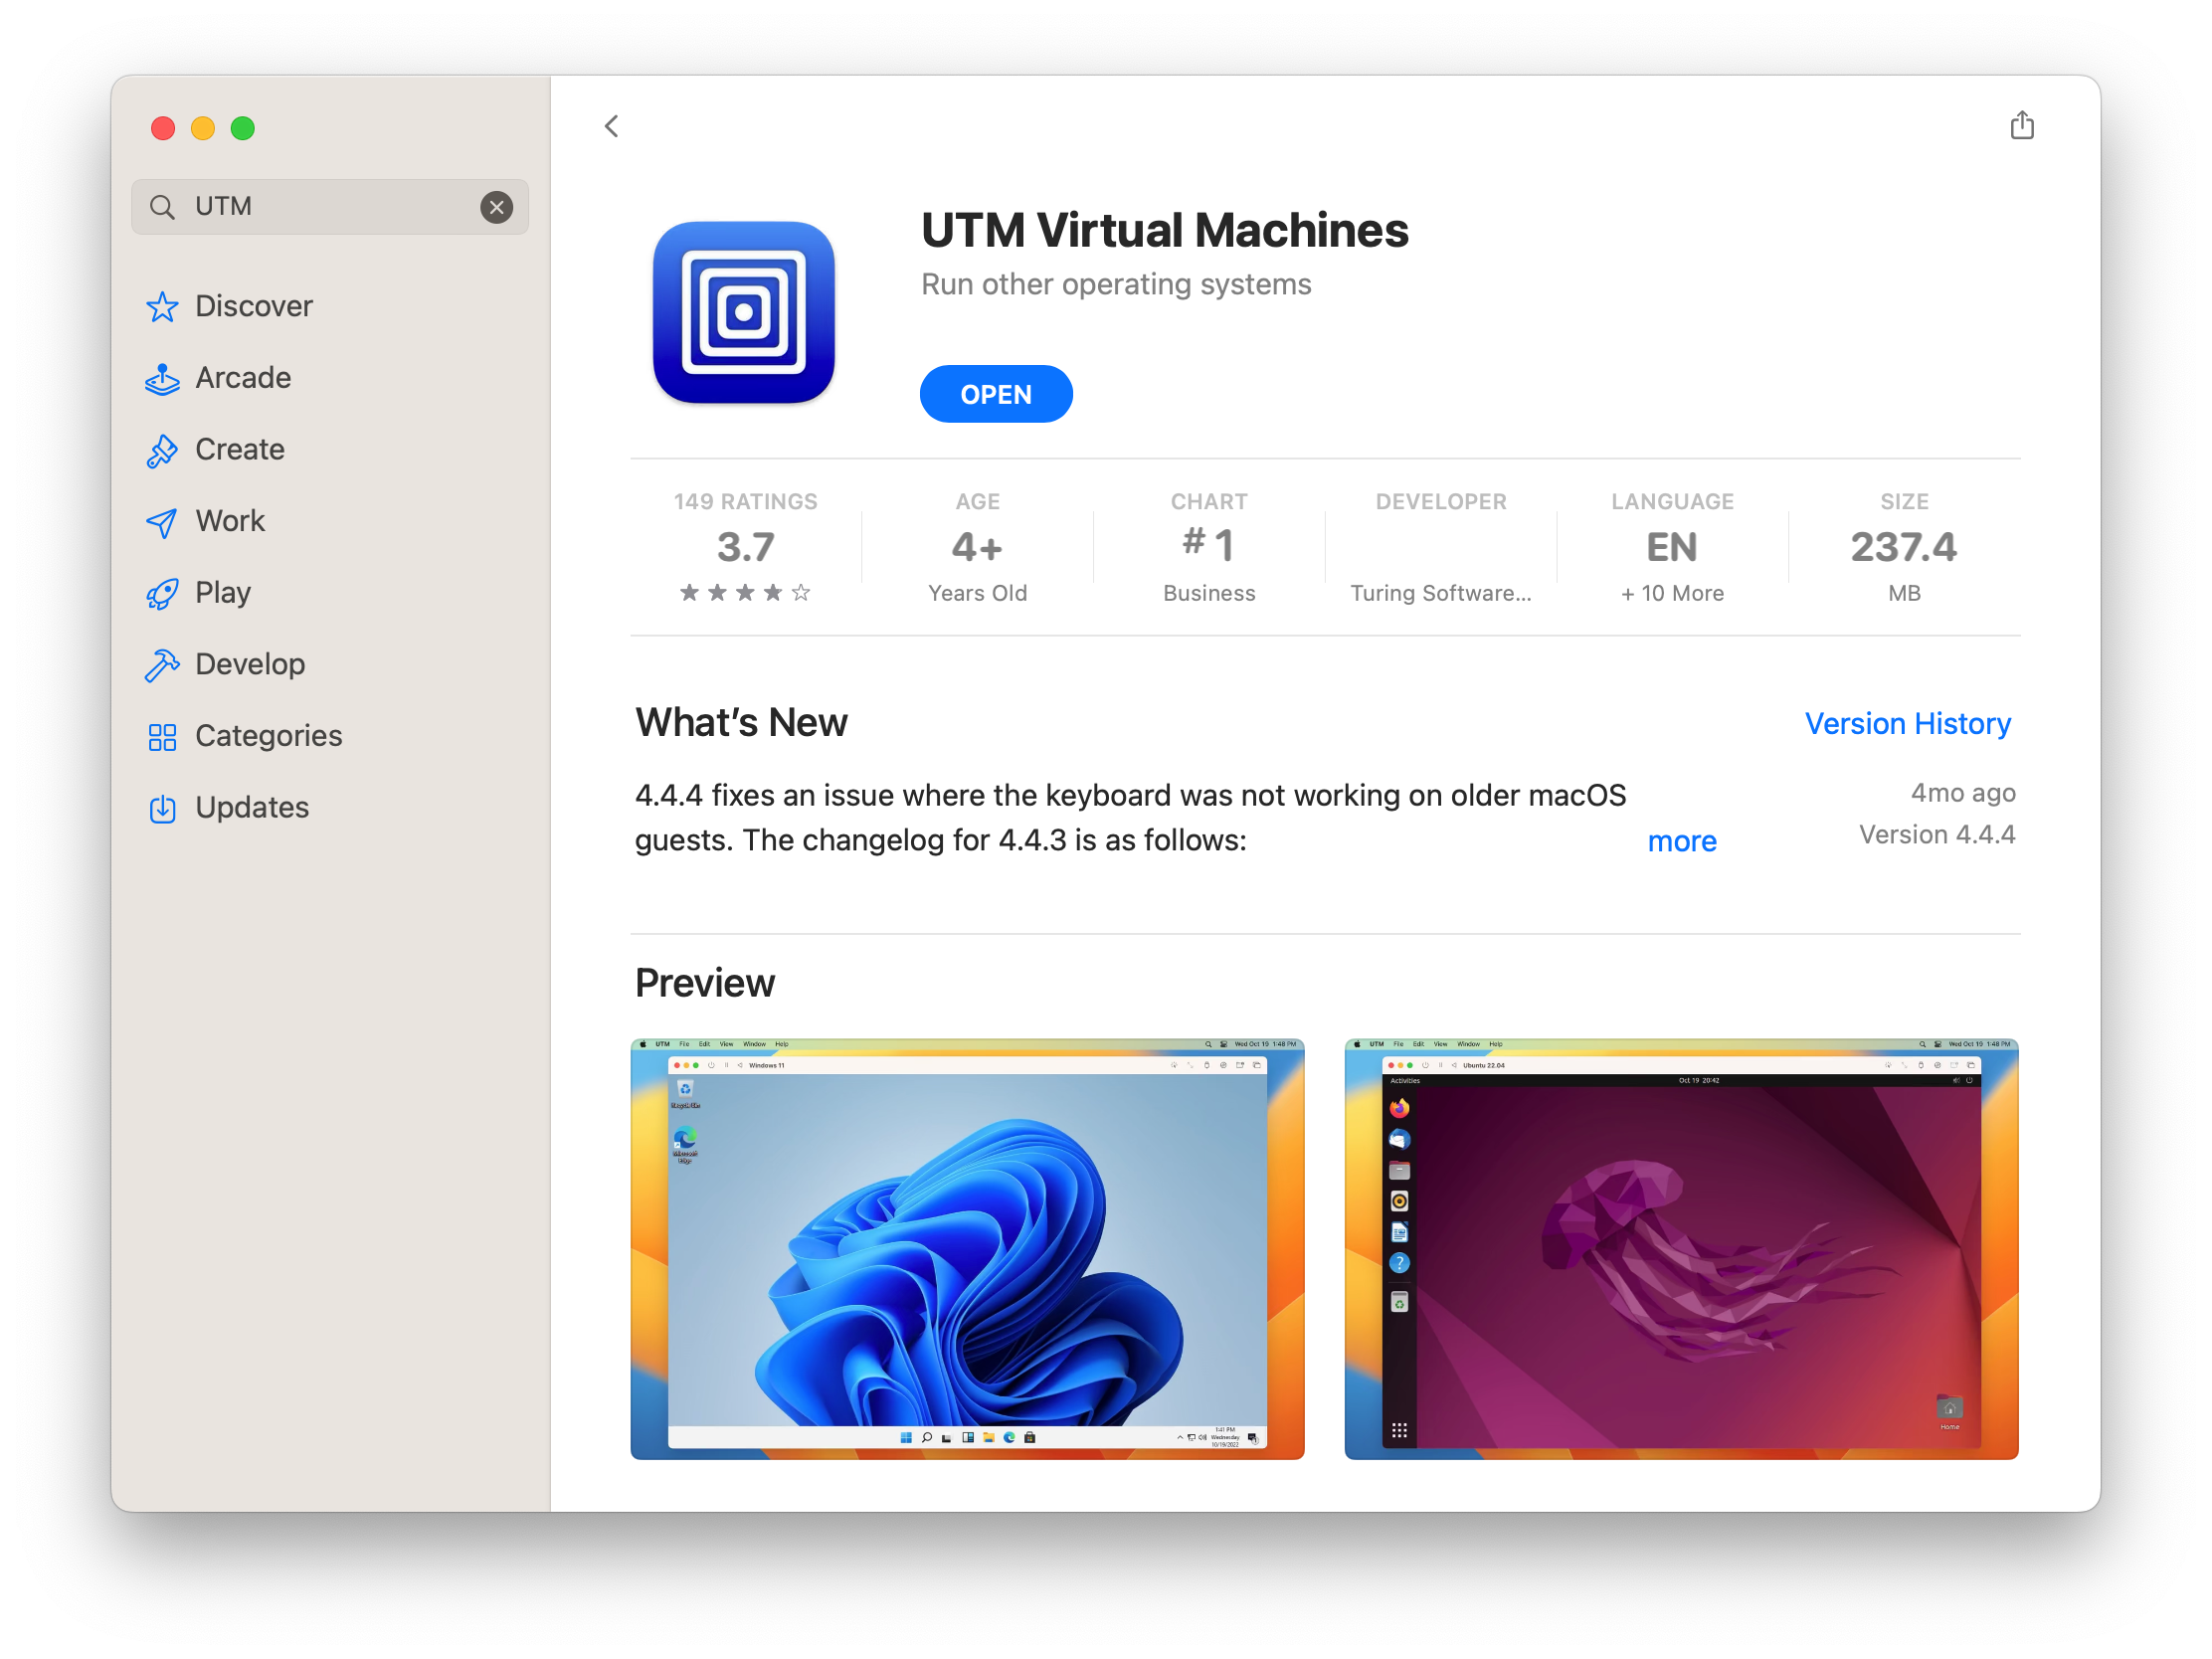
UTM in the App Store
3. Download Ubuntu Server Disk Image
We will install Ubuntu Server because it is more lightweight than the Desktop variant. In particular, it does not have support for a graphical user interface (GUI). Accordingly, we will interact with the guest opeating system though the command line interface. You can read more about the differences between Ubuntu Server and Ubuntu Desktop on the Ubuntu Wikipedia article.
You can download Ubuntu Server from the official Ubuntu website.
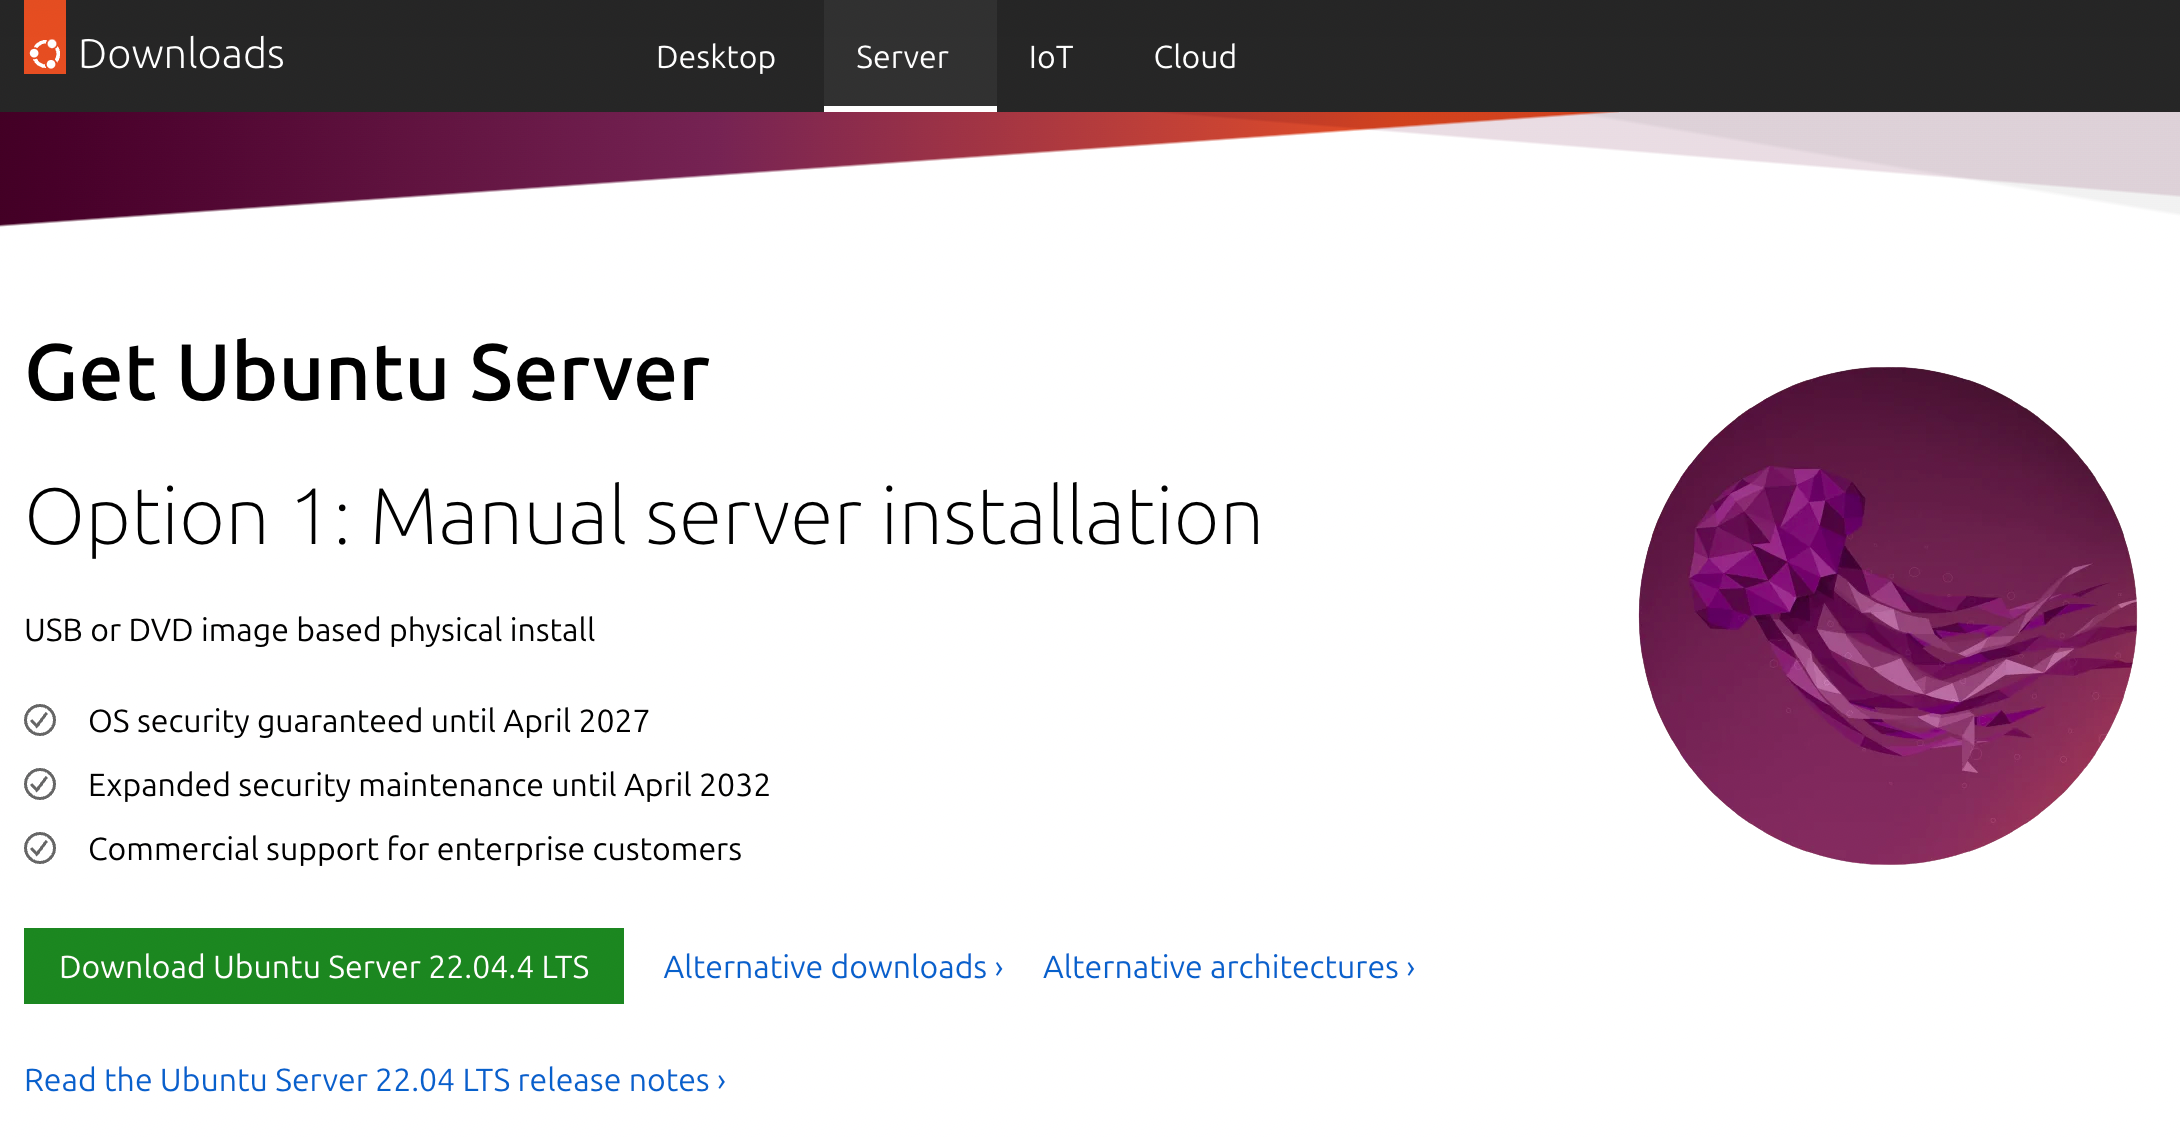
Download Ubuntu Server disk image
4. Launch Ubuntu Server
In UTM, select "+" and "Virtualize"
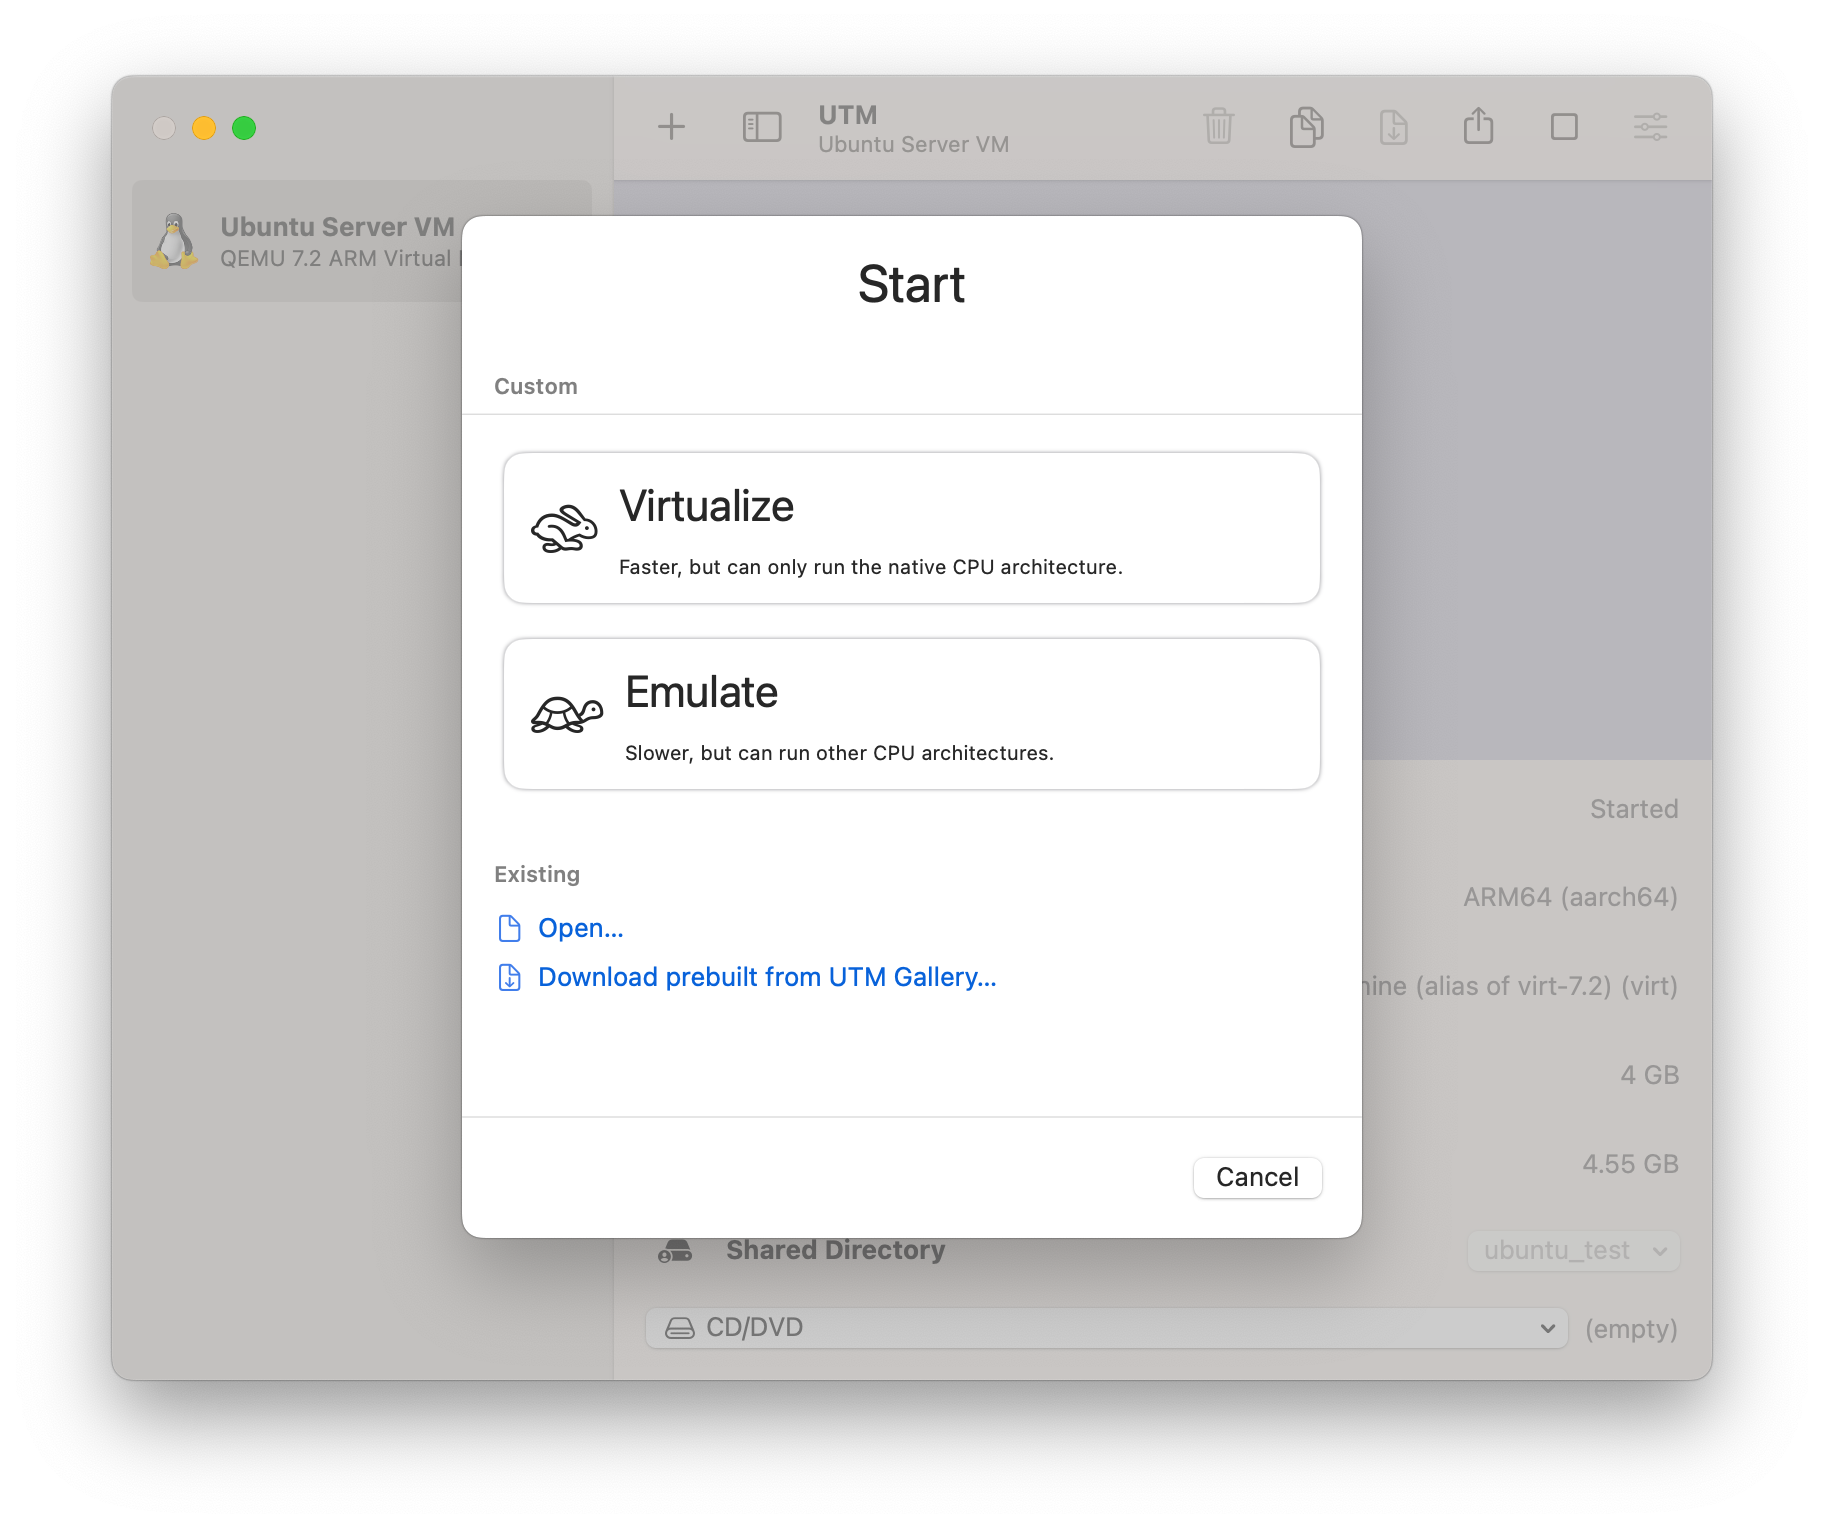
"Select the 'Virtualize' option"
Select the "Linux" option.
Browse for the Ubuntu Server disk image that you downloaded:
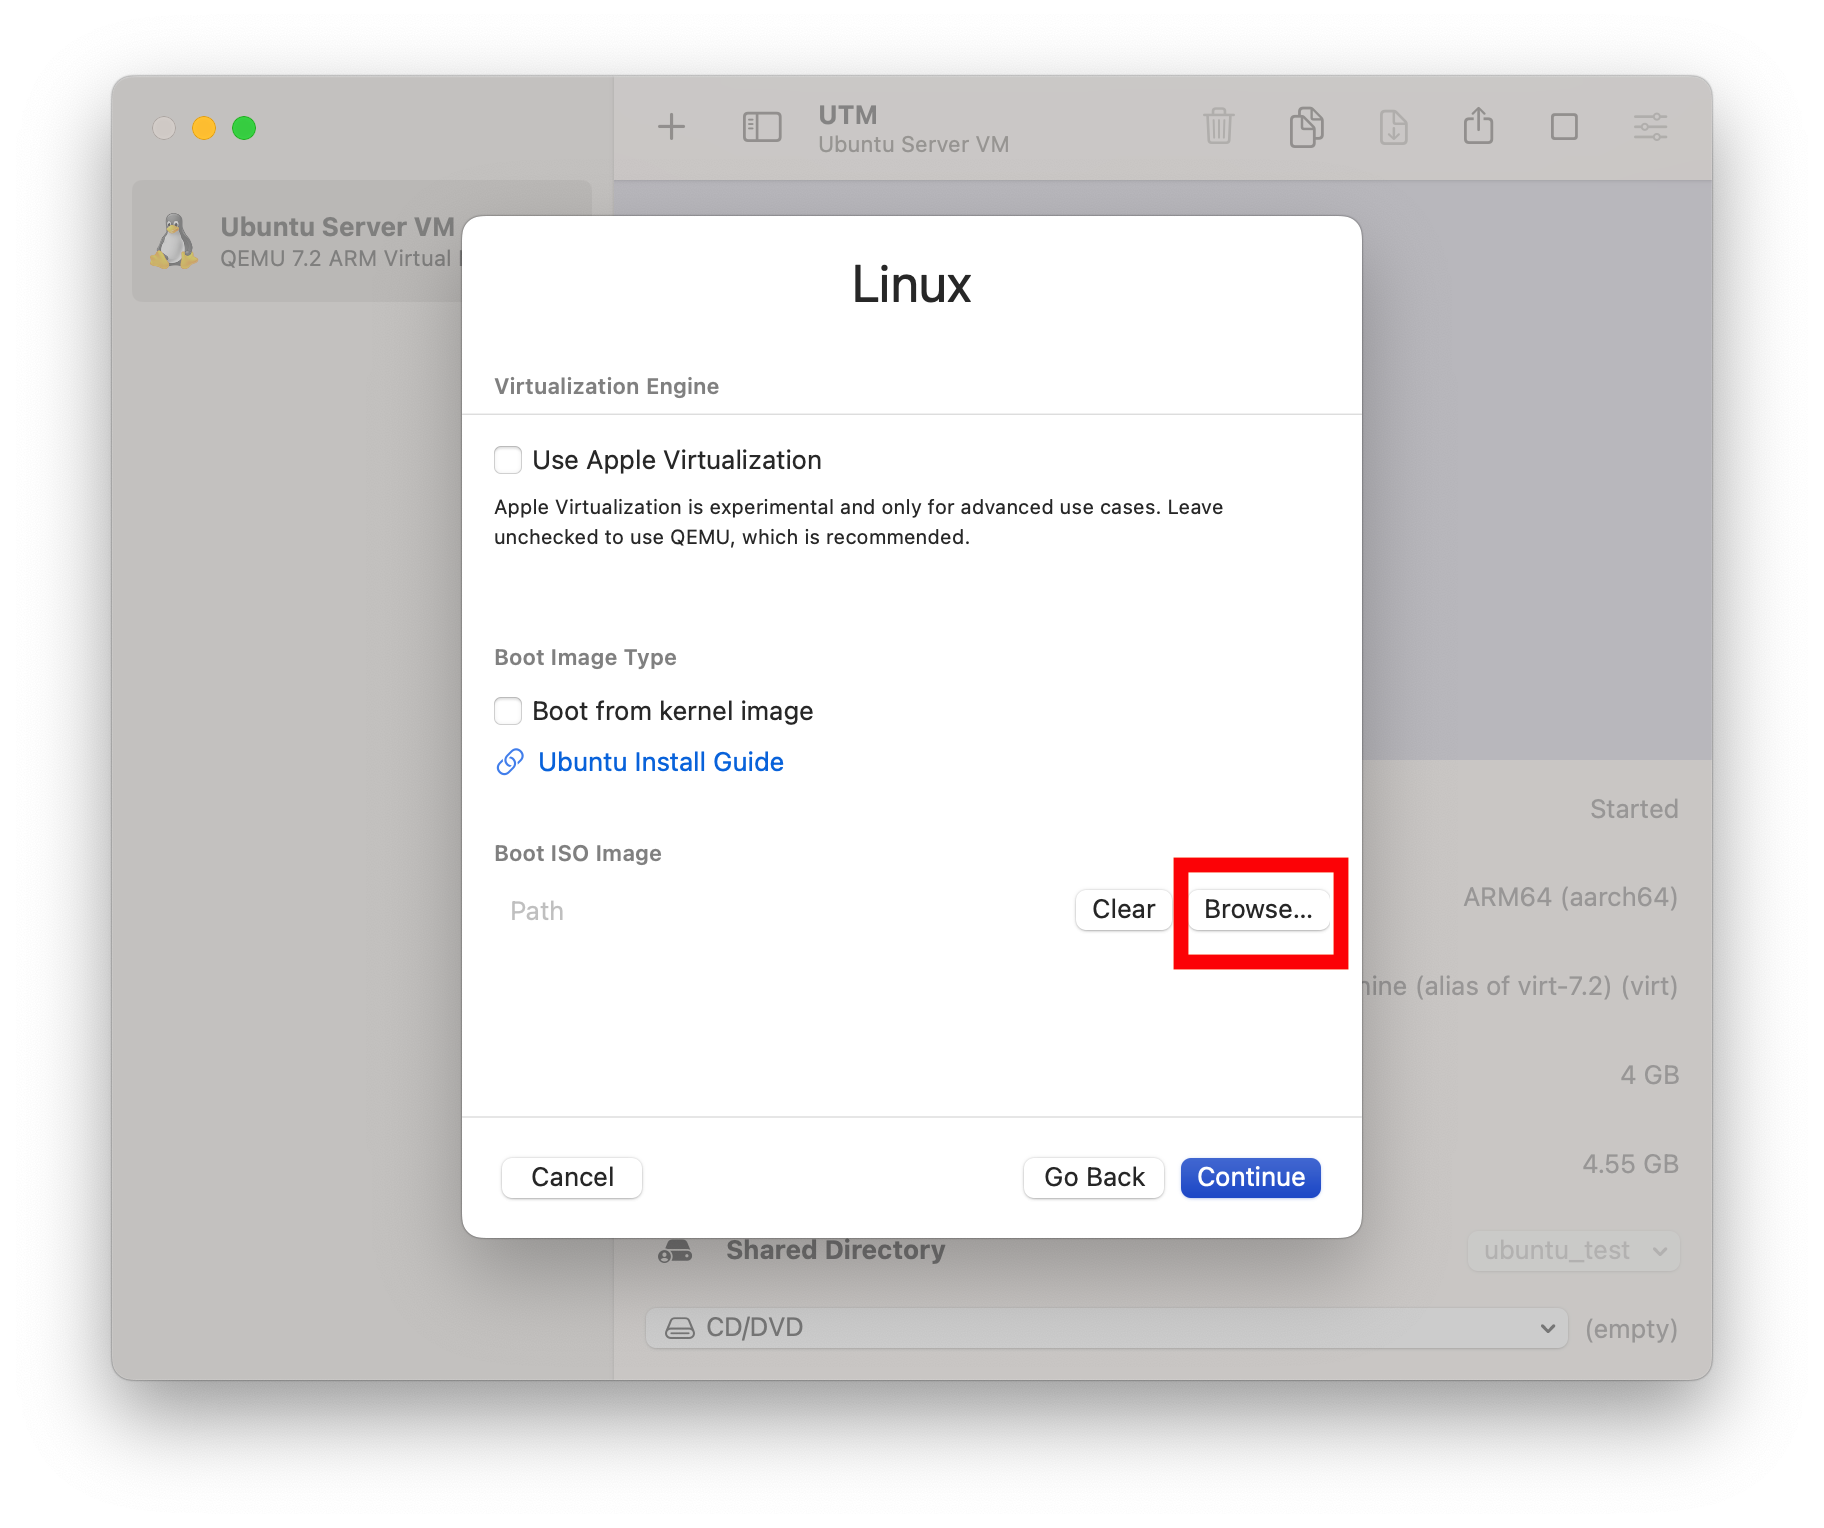
Browse for the downloaded Ubuntu Server disk image
Use the hardware default settings:
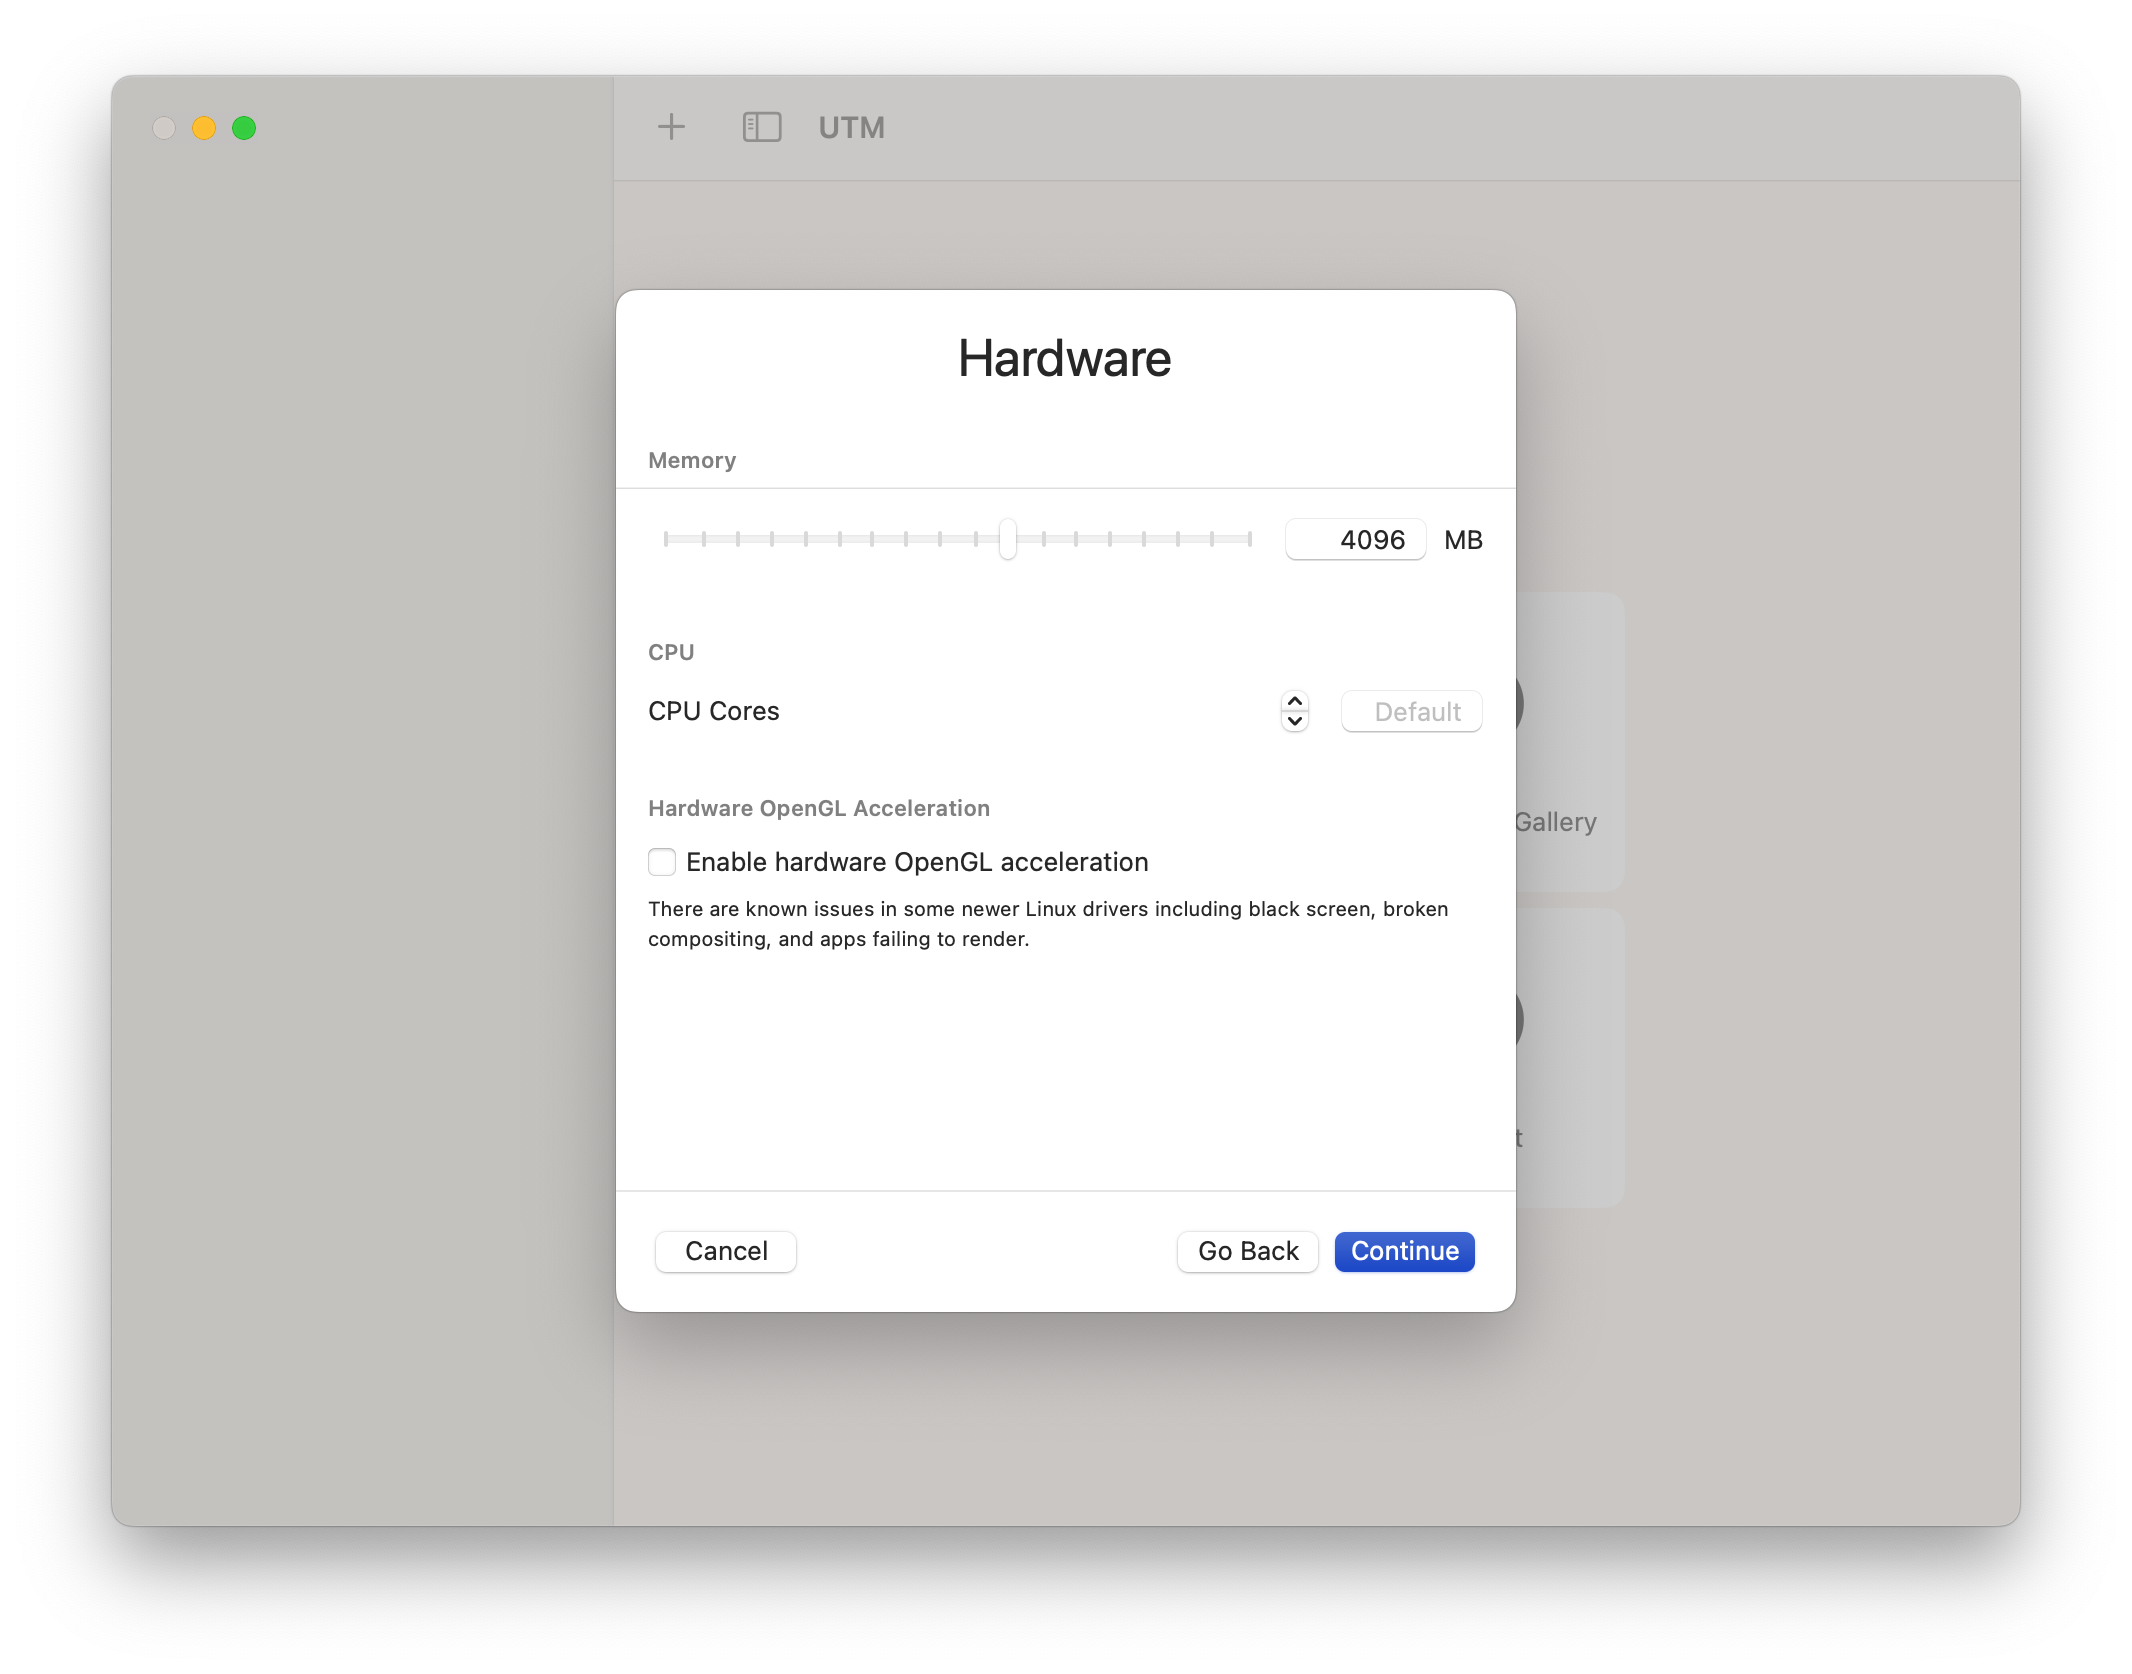
Use the hardware defaults
At the next prompt, select a "storage" amount that it significantly larger than the minumum requirements specified by Ubuntu. For example, we are using 32GB for this tutorial.
Next, UTM will prompt you for a "Shared Directory." For this, you can create a directory to share on the host machine. I've created a directory on my Desktop called "ubuntu_test". Of course, you can call this whatever you like.
The final prompt will review all of your settings. You can also specify a name for your virtualized server here:
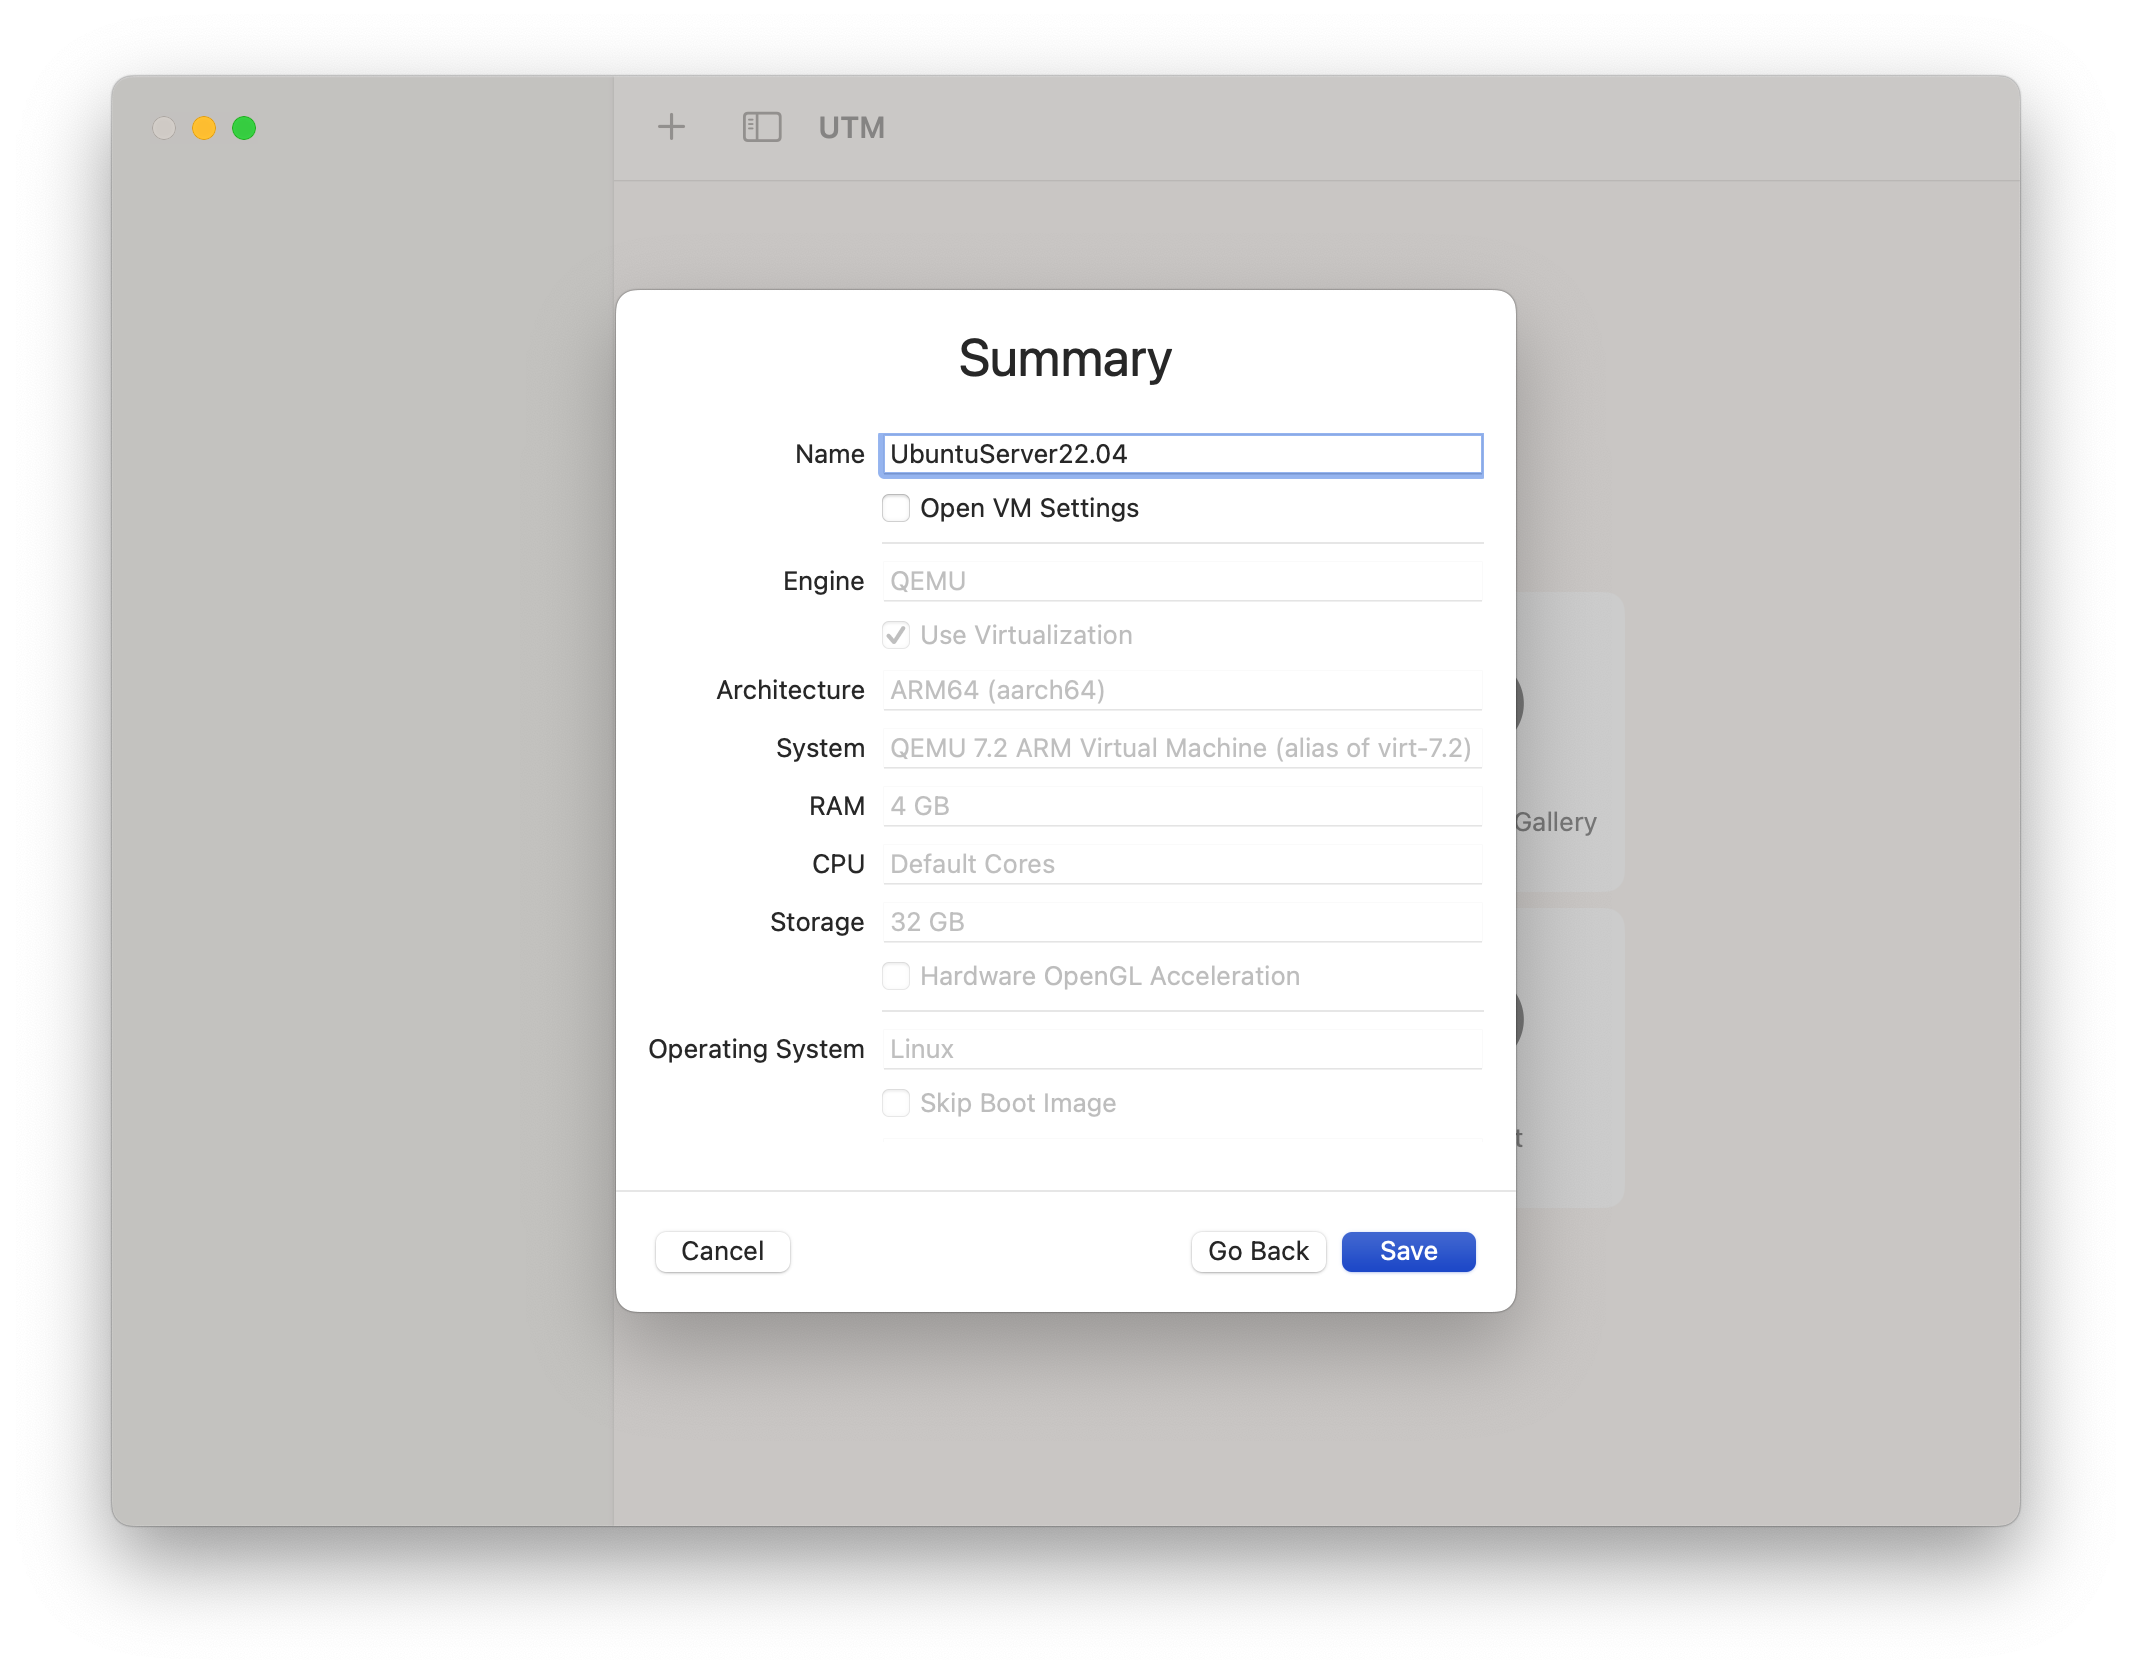
Use the hardware defaults
You can now click the triangular "play" button to launch your vitural machine!
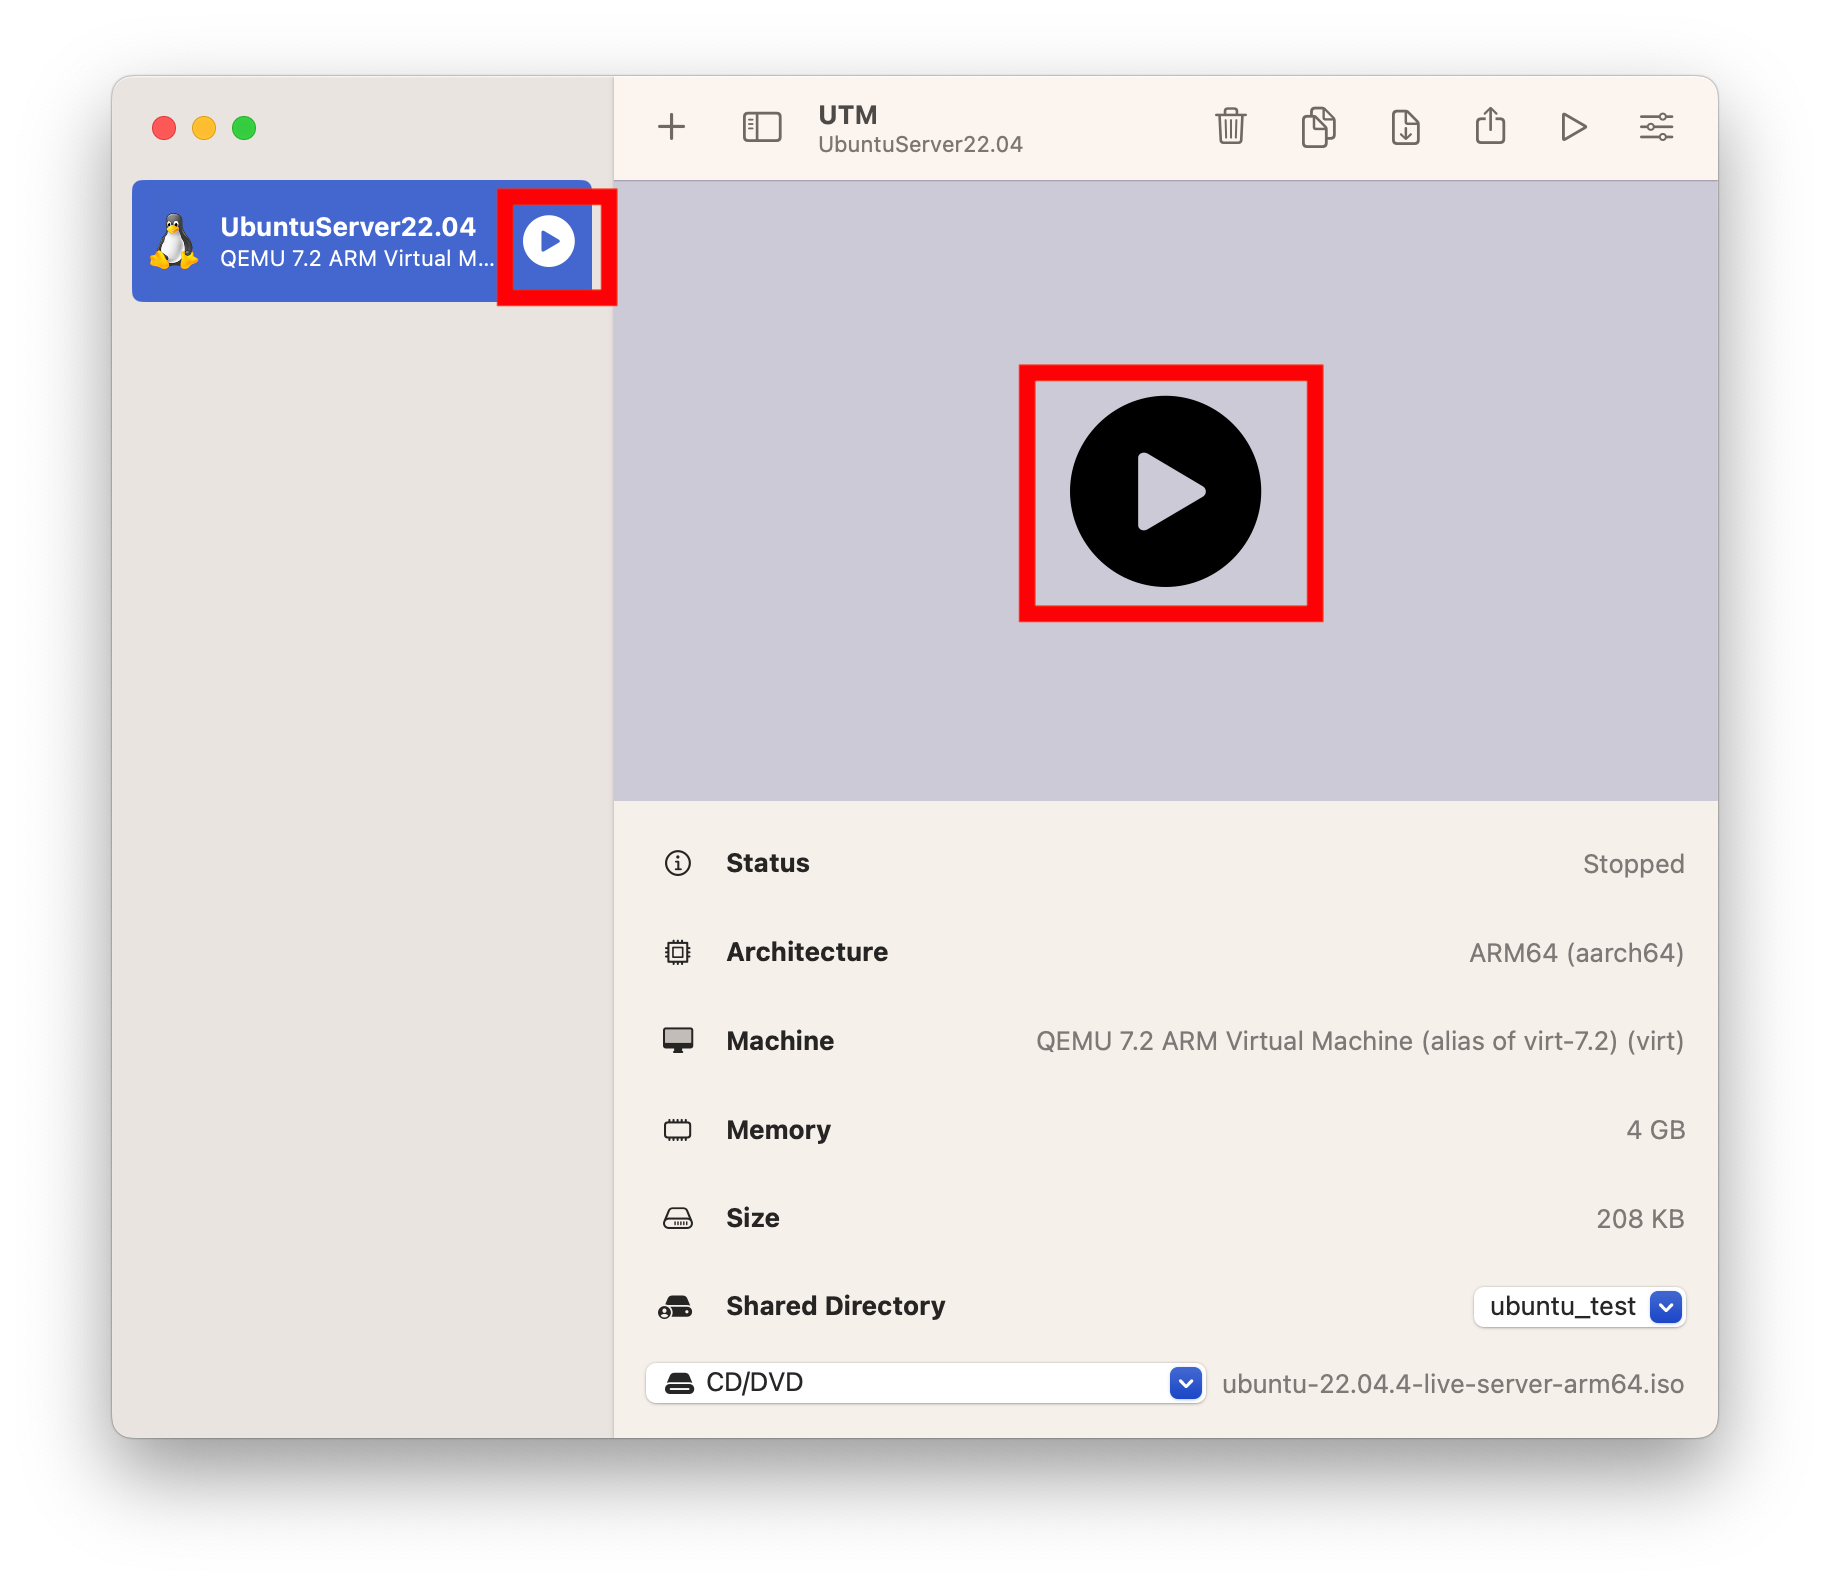
Press "Play" to launch your new VM!
5. Install Ubuntu
The first thing you will be prompted to do is to install Ubuntu.
Follow the install instructions (here and here). If you have enough resources, then you will be able to do the "guided install."
For most steps, you can just press enter/return and/or select the default options. For example:
Choose the standard "Ubuntu Server" install option:
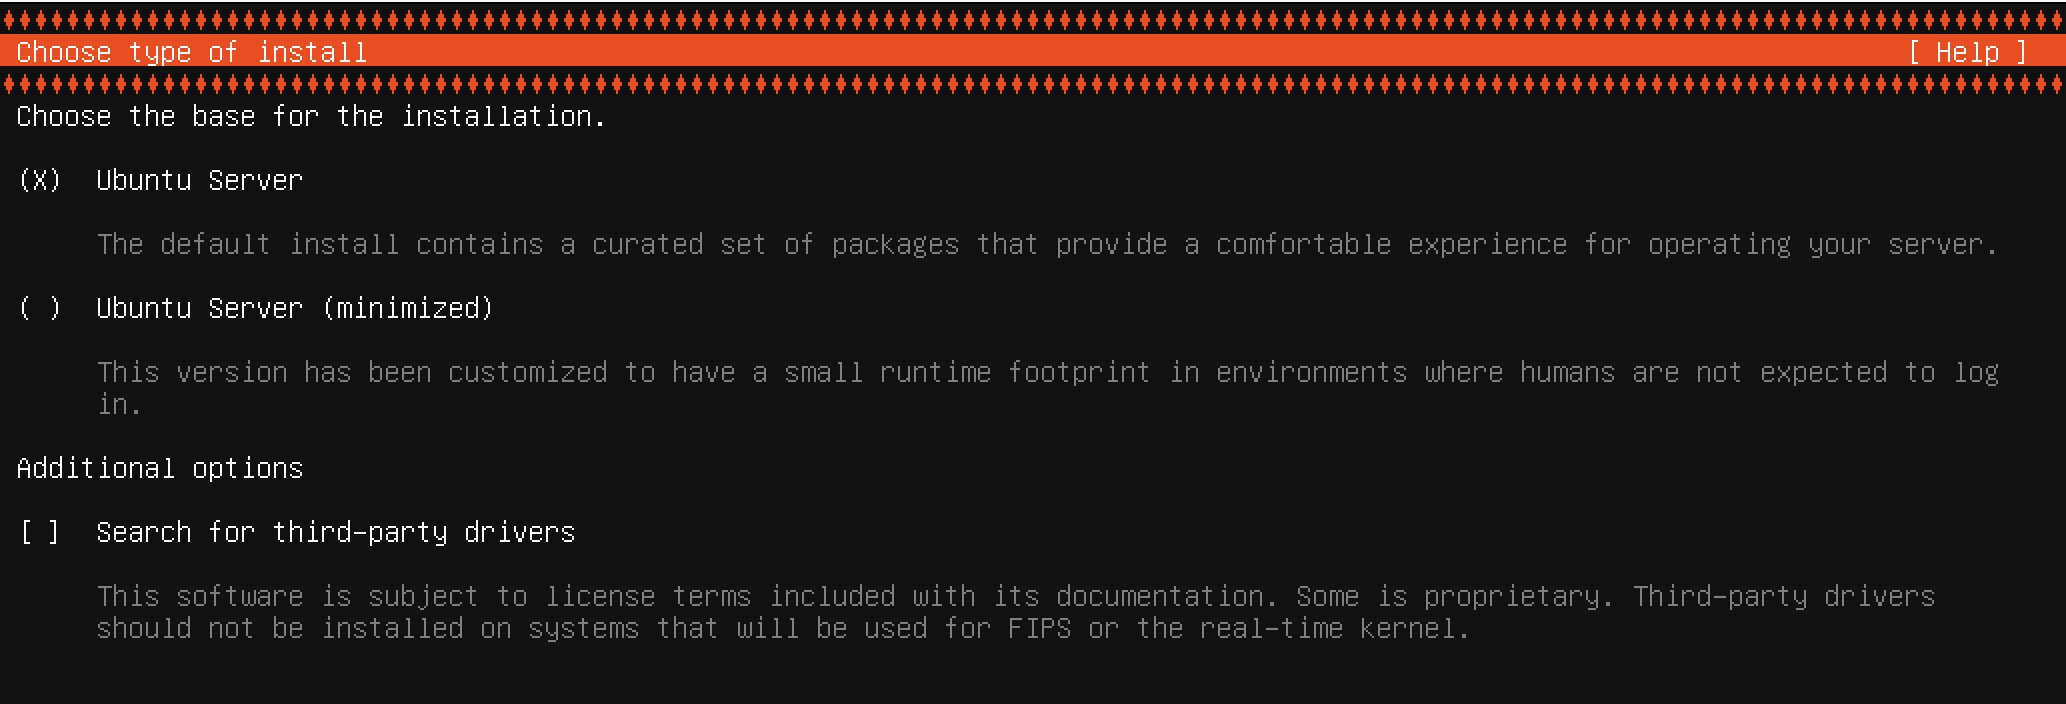
Choose the default install type

Choose the default network connections
On the "Profile Setup" screen, enter the appropriate information:

Enter profile and login information
You can skip the upgrade to "Ubuntu Pro":

Enter profile and login information
Do, however, select the option to install OpenSSH server. This will allow us to access our VM via Secure Shell (SHS). We'll go into this further below.

Select the option to install OpenSSH Server
After the installation is complete, you will be prompted to reboot Ubuntu Server. This will bring you to a blinking black screen. This is because the "install drive" has not been "ejected." Click the "power" button:

Shutdown the server in order to "eject" the installation drive.
Don't click the triangular "restart" button, or you will lose the install!
6. Enabling Fileshare between Host and Guest Machines
You should now be able to log in to Ubuntu Server! However, you find yourself in a Situation where you want to put a file on the virtual machine guest machine from your host machine. Remember, that your host machine and your guest machine are literally two separate systems, so "dragging and dropping" a file from your host machine probably work. Rather, you will need to specify a directory on your host machine that will be allowed to be accessible from the guest VM. In order for the guest machine to recognize this directories, it will need to be mounted.
Setting up file share:
Allow file share on the Mac (test to see if this is absolutely necessary)
Go to "system preferences" > "sharing"
Made sure that file sharing and remote login are enabled. (test to see if both of these are necessary)
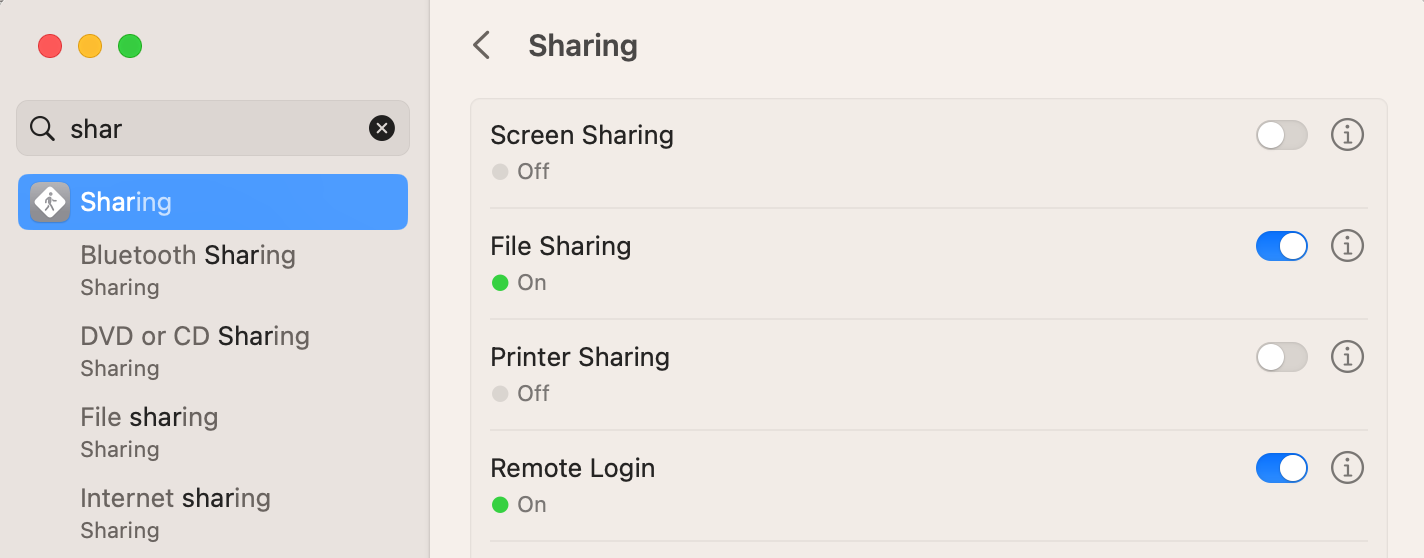
Ensure that file sharing is enabled on your host machine.
Specify the "shared directory" from above as the one you want to share in the UTM interface:
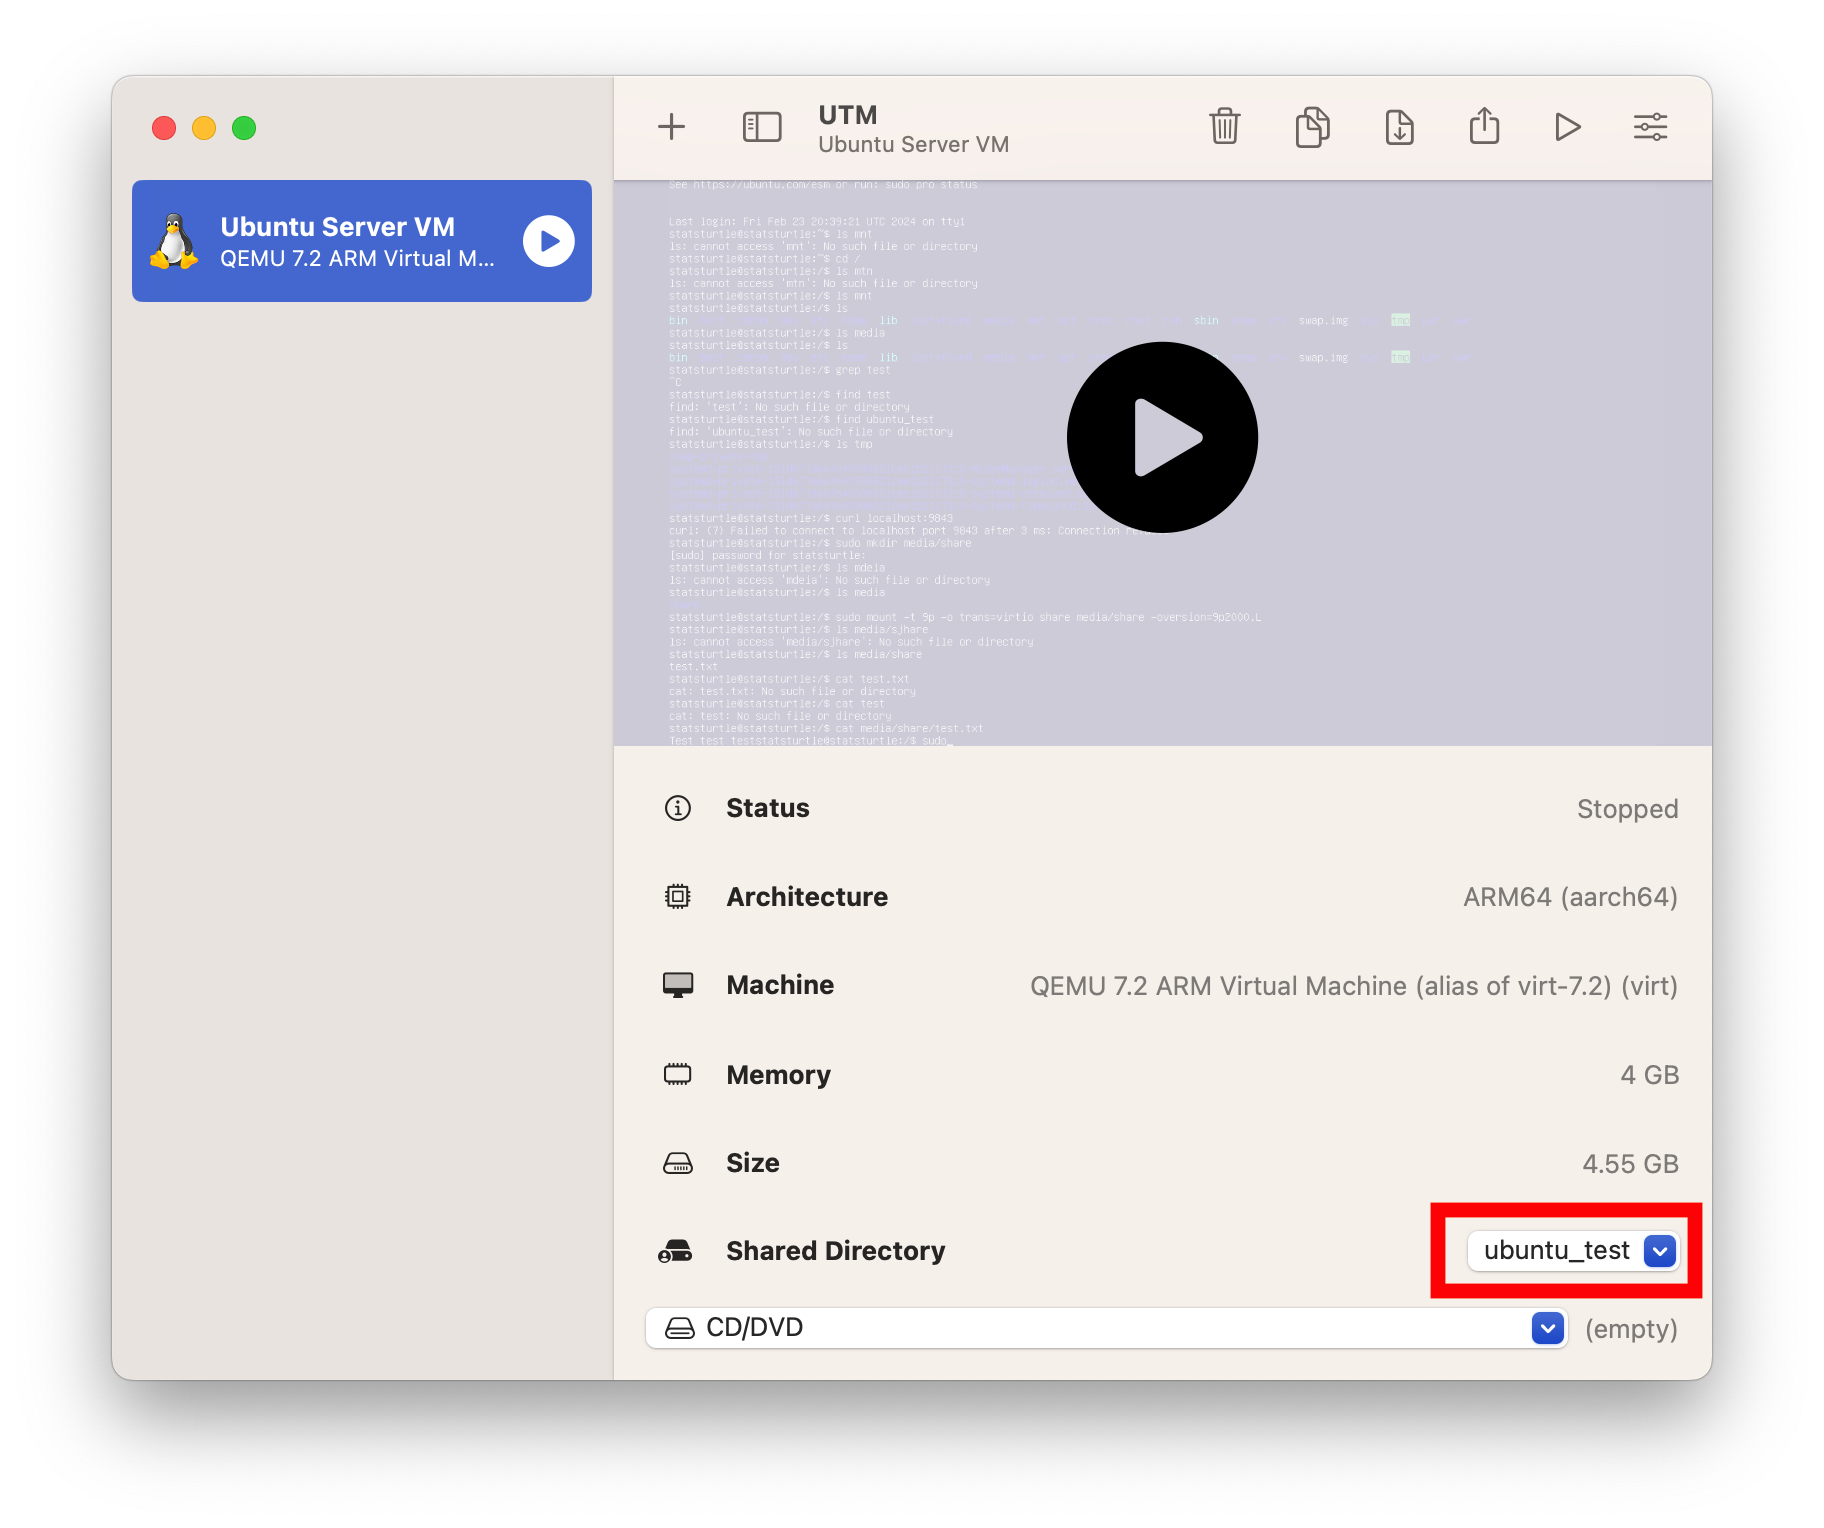
Browse for the downloaded Ubuntu Server disk image
To do enable filesharing, the VM will need to be shutdown. You can "gracefully" shutdown Ubuntu Server with:
sudo shutdown now
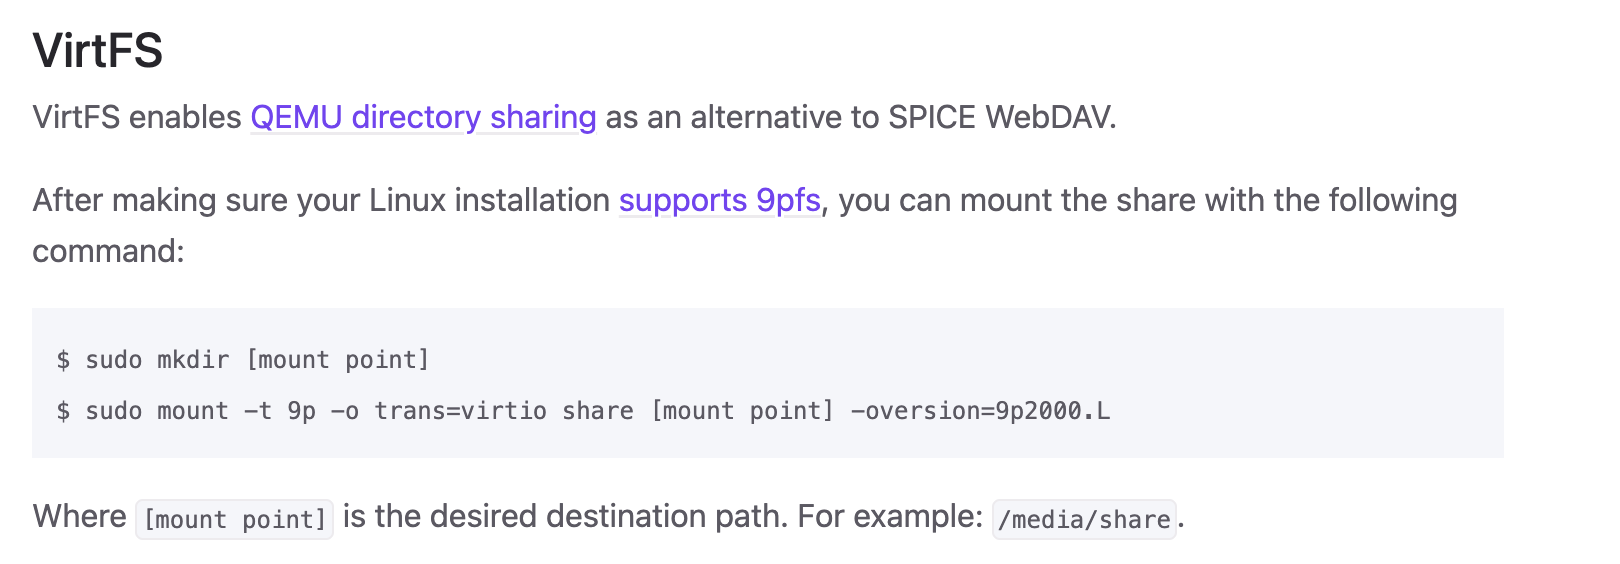
We used the "VirtFS" file system interface to mount the shared directory on the guest machine. Keep in mind that the process is different depending on the OS of the guest and host machines (see the UTM documentation). On the guest machine (Ubuntu Server VM), you will need to mount the file system that is being shared by the host:
There's a bit to unpack here:
-t 9prefers to a 9p file system "type."-o trans=virtiospecifies that we are sharing "over" virtio.9p2000.Lis a file sharing protocol. The.Lspecifies a version for Linux.
Edits to shared files will also effect the version on the host machine.
The shared directory will need to be mounted on start each time unless you modify the fstab configuration file in Ubuntu:

Modifying the "fstab" configuation
You can find these instructions in the UTM documentation, as well.
7. Enabling SSH Access to the Guest Machine
One obstacle that you will quickly encounter is that you are probably not able paste copied text from your host machine in the terminal of the guest machine. This is tricky because even if you have clipboard sharing enabled in UTM, you won't be able to copy and paste into the guest command line interface because Ubuntu Server doesn't have a clipboard capability (it's an X11 GUI feature).
Your best option is to access the VM guest through SSH (Secure Shell) from your host machine, as opposed to using the UTM interface. Here's how you can set that SSH access:
- Shut down the VM guest and go to the VM's settings (right click + edit)
- Set the network mode to "Emulated VLAN."
- Then forward port 22 traffic to port 22022 on the VM:
- Then, you should be able to SSH in from the host,
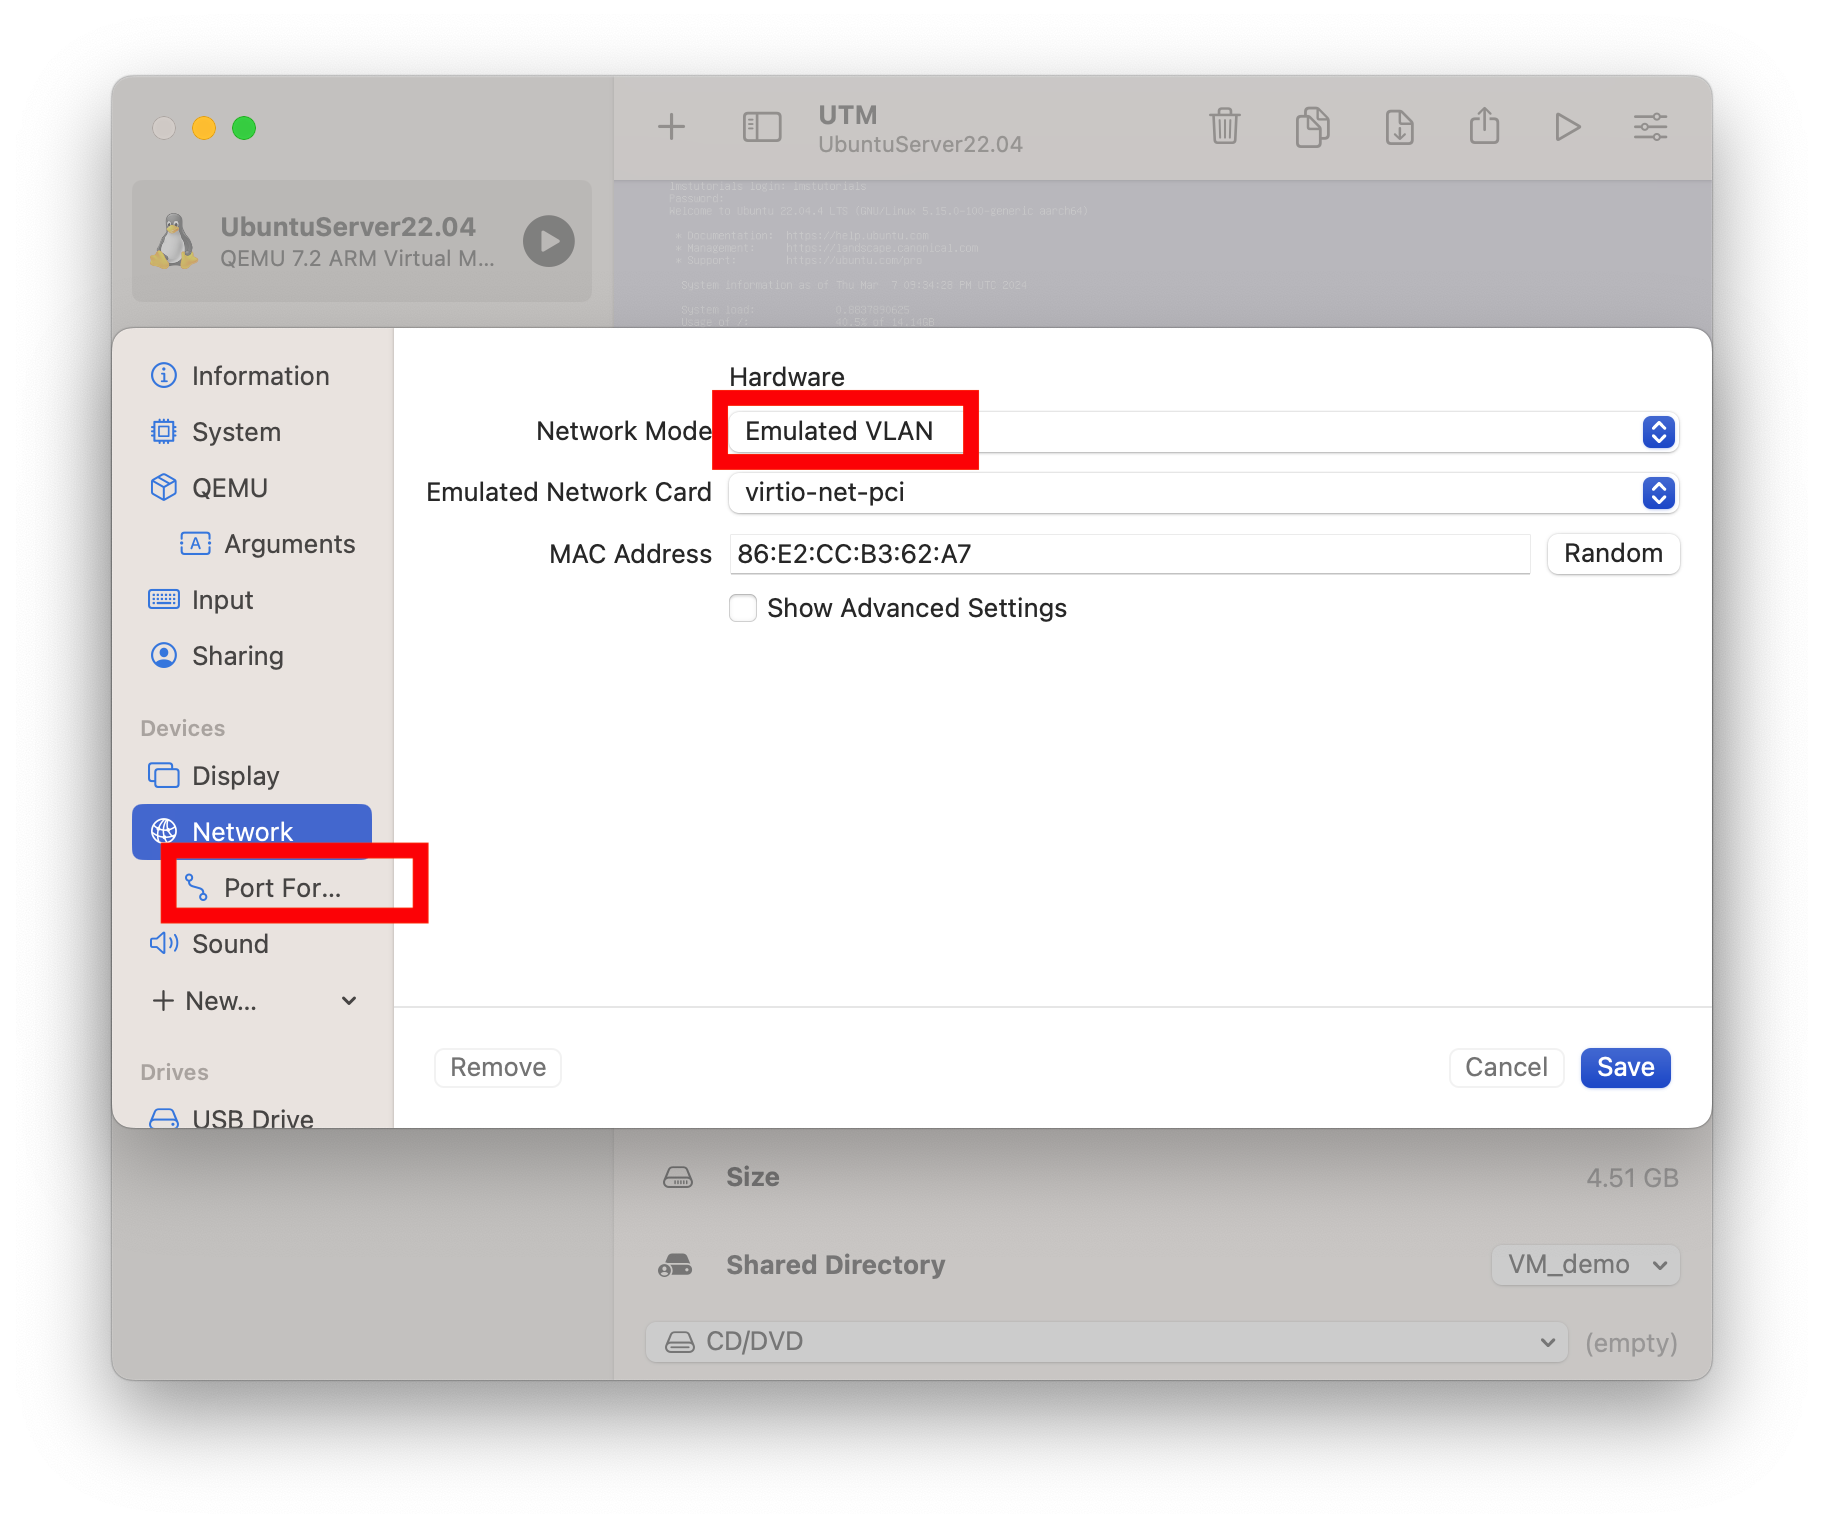
UTM Network Settings
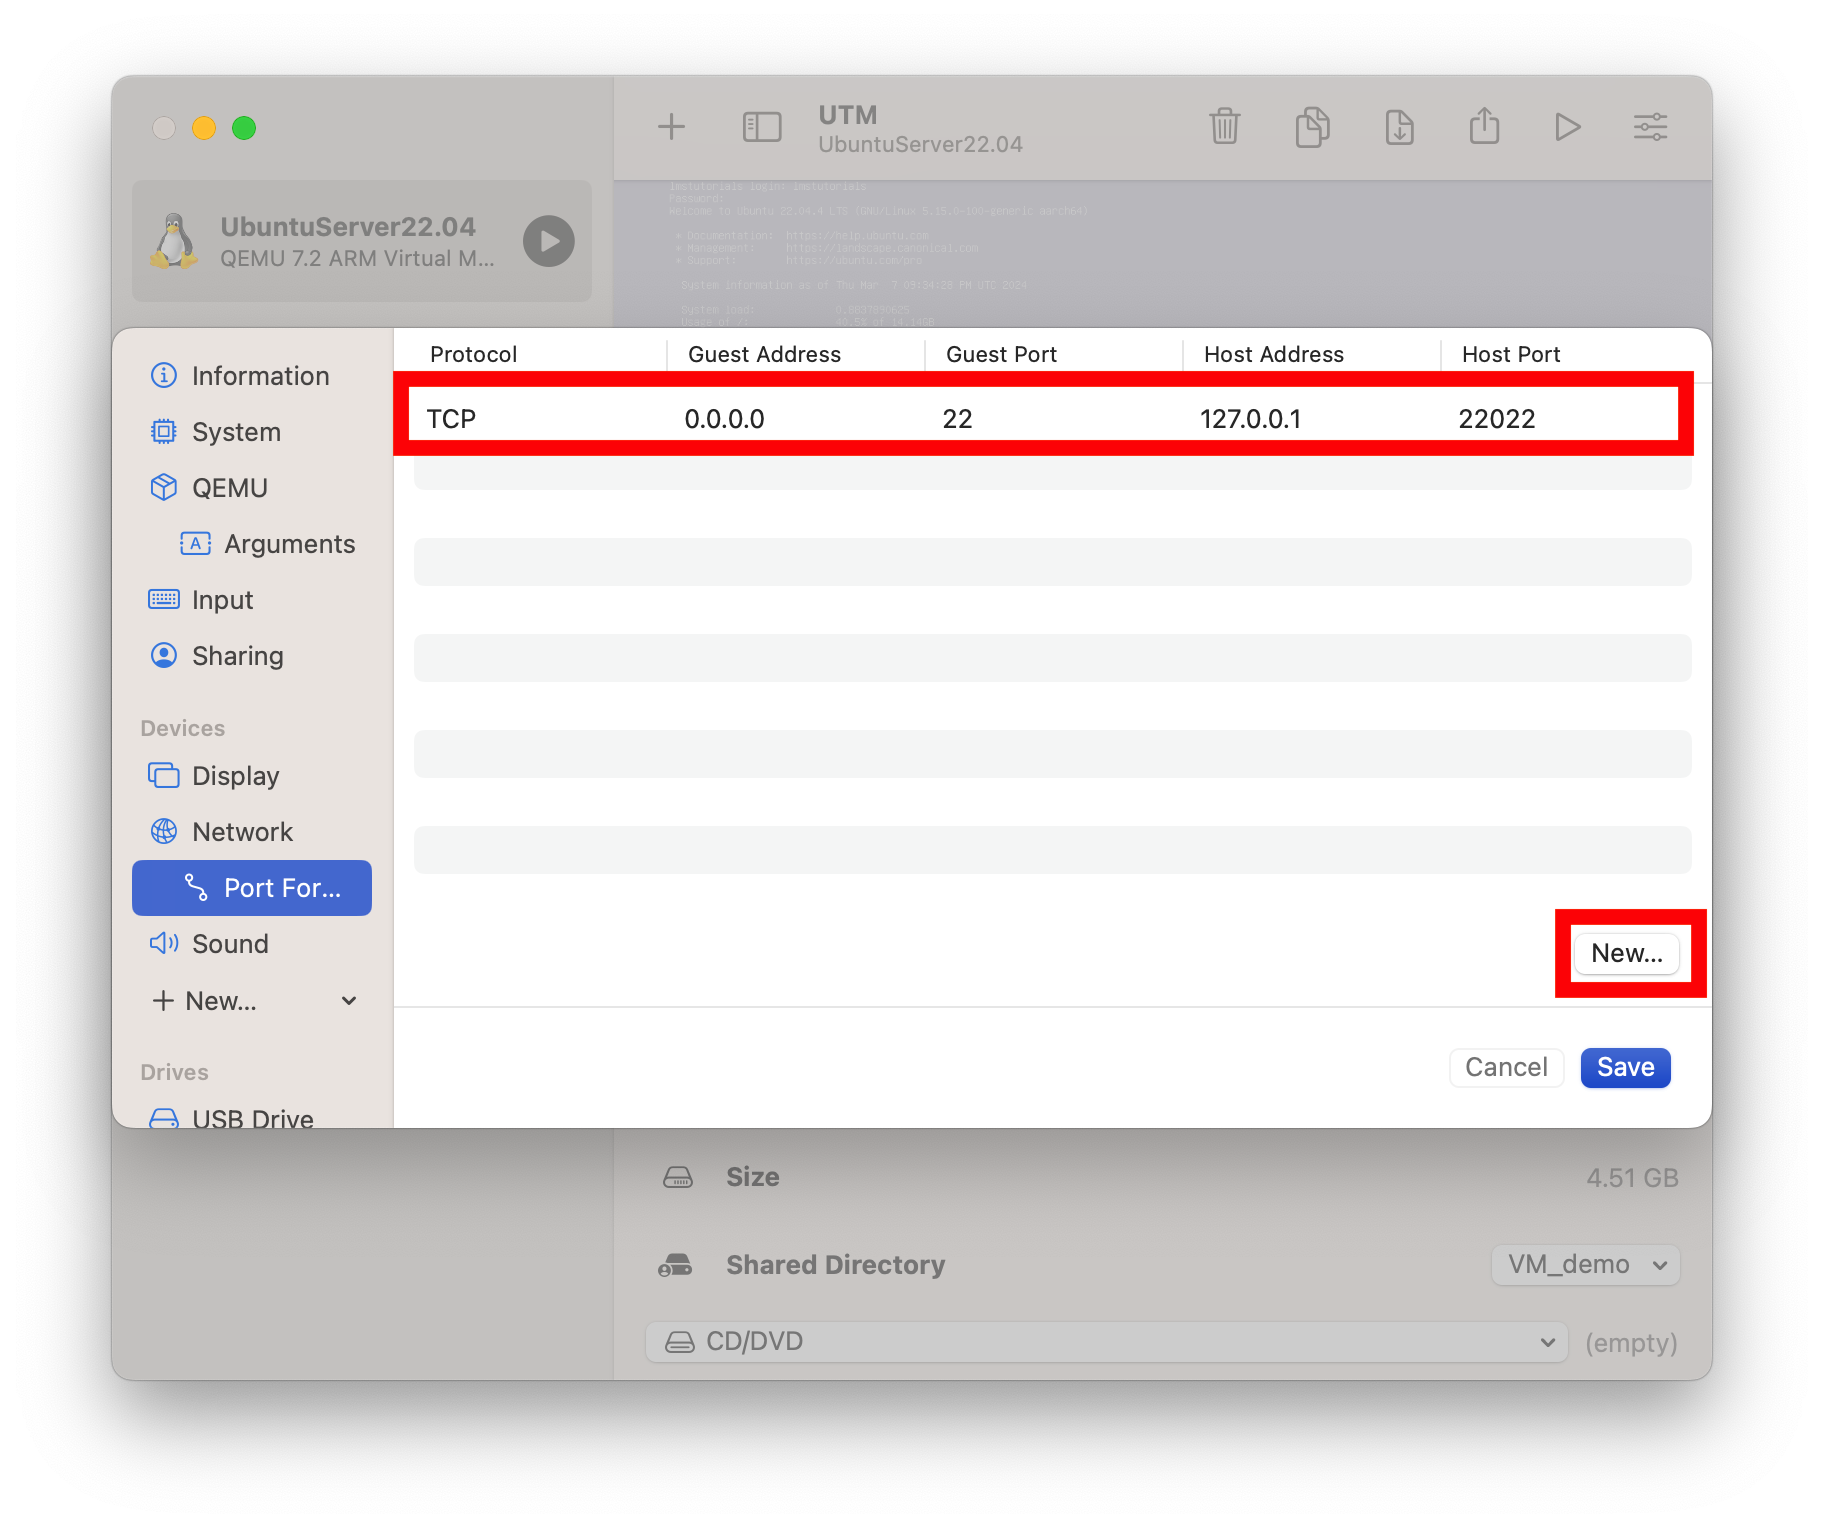
TCP settings for SSH access
(You can set what ever port on your host machine is available -- it doesn't have to be 22022.)
Sometimes we had trouble here because the port forwarding isn't enabled. In that case, check to see if you can still SSH on port 22.
You can read a bit more about the difference between 0.0.0.0 and 127.0.0.1 if these addresses are unfamiliar to you.
ssh lmstutorials@192.168.64.6

Example of SSHing from Host into Ubuntu Server Guest
Make sure that the guest machine is running or you won't be able to SSH in!
8. Resizing VM Window
In the display settings for your virtual machine instance, select "retina mode".
If the text size in console is too small in a Ubuntu Server guest, for example, you can change it in /etc/default/console-setup

CLI font size options in Ubuntu Server
Conclusion
Congratulations! Setting up a virtual machine offers a convenient, safe, and efficient solution for both educators and learners to demonstrate and/or practice software installation procedures. By leveraging virtualization software like UTM, you can create isolated environments to practice software installations without risking your primary operating system. This tutorial has highlighted the step-by-step process of configuring a virtual machine and installing necessary software. Whether for educational purposes, software testing, or experimentation, virtual machines provide a valuable platform for hands-on learning and exploration in a controlled environment. With these skills and tools at hand, you can confidently engage in software installation procedures, enhance your understanding, and advance your proficiency in various computing environments.
