Launching a Containerized Moodle Instance with Docker
Looking to set up Moodle as fast as possible to test some features? Installing and configuring Apache, PHP, MySQL (etc.) on a fresh OS install can get annoying after a while. By containerizing Moodle, server, and database images, Docker makes your life easier! This tutorial covers installing, configuring, and using Docker and Docker Compose for Moodle. While other tutorials may just give you a Bash script or a configuration file, we actually walk you through the concepts behind containerization and why each step does what it does. Get ready, you’re about to have Moodle running in no time!
Table of Contents
I. Introduction: Why Docker for Moodle?
II. Prerequisites
III. Instructions
- Install Docker and Docker Compose
- Clone MoodleHQ GitHub Repo
- Define Environment Variables
- Clone Moodle Code
- Create "config.php"
- Create "moodledata" Volume
- "Spin Up" the Compose App
- Install Moodle at "localhost"
- Shut Down your Containers
IV. Conclusion: Docker is Not a Magic Bullet
VI. References
Introduction: Why Docker for Moodle?
Install Ubuntu, Apache, PHP, MySQL... (Repeat 100x 😭)
Testing Moodle features can be annoying if you try and use the exact same instance. For example, always deleting all existing Moodle files and then reinstalling them is time consuming. Also, there is some risk that you will accidentally not return your system to the exact same initial state. It can be even more painful if you are trying to test different versions of required software, i.e.: Apache web server, PHP, and a database (e.g., MySQL, MariaDB, etc.) For example, you might want to test on different versions of PHP, etc., if you are testing third-party plugins that are not officially supported by Moodle.
Containerization to the Rescue!
Docker allows you to take a snapshot of all of the required software installed on a blank machine, from which you can then make a copy whenever you want. The snapshot is called an image and the new “copy” that you create from the image is called a container. Essentially, this means that you do never have to install and delete program files, only spin up and shutdown containers.

"Containerization is egg-celent."
Advantages over Virtual Machines
If you are familiar with virtual machines (VMs), this idea may sound familiar. With a VM, one could setup a "template" machine with all of the software needed, and then clone it whenever testing is needed. However, containerization has several advantages over VMs. For one, containers are less resource intensive; While a VM is a full computer that runs inside your computer, Docker uses the kernel of the host OS, which is not the case with VMs, where each virtualization contains its own separate kernel. Reducing OS redundancies in this way can add up to a big savings. Also, upon creation of a VM, a certain quantity of RAM is allocated for its use, which is reserved and not usable by the host while the VM is active.
Another advantage is the Docker Compose program. When using Docker Compose to coordinate various Docker containers, various containers can easily be swapped. For example, a container running PHP 8.1 could be swapped for one running PHP 8.2 without needing to reconfigure the entire system. This kind of compartmentalization of different processes is not possible with VMs.
Finally, I've found testing networks to be easier with Docker than with the UTM Virtual Machine platform, at least on Mac. Certainly, the Docker networking documentation is much better than UTM’s!
"Docker helps developers build, share, run, and verify applications anywhere — without tedious environment configuration or management."- Docker.com
Docker in a Nutshell: A Top-down Approach
One of the problems with a tutorial about Docker is that Docker can be a bit complicated if you’re not already familiar with containerization. Therefore, this tutorial I will attempt to give as simple and succinct an explanation of Docker as possible. Also, as much as is possible, I will try to introduce the foundational concepts of Docker in the context of Moodle, rather than from the ground up in isolation. Furthermore, I’ll try to use the "moodle-docker" collection of containers as a focal point.
The "moodle-docker" image
Containers built from the moodle-docker image will contain a version of PHP, Apache, and five database servers (PostgreSQL, MySQL, Microsoft SQL Server, Oracle XE) —-really, everything you need except for your installation of Moodle (which is a bit counter-intuitive in my opinion, given the name of the image!) This image, in turn, is built from a “parent image”, the "moodle-php-apache" image, plus images for the various databases. From the “dockerfile” of the moodle-php-apache image, we can see that it has its own parent image called "php:8.3-apache-bookworm:"

PHP Bookworm Parent Image
This image is composed of many packages and the OS for this image is Linux:
docker exec -it moodle-docker-webserver-1 uname In particular the Debian distro:
docker exec -it moodle-docker-webserver-1 cat /etc/os-release Returns:

Docker is running Debian (Linux)
You can check that the apache webserver is running in the “moodle-docker-webserver-1” container:
docker container ls

                                    docker exec -it moodle-docker-webserver-1 service apache2 status
The first line returns “moodle-docker-webserver-1” as one of the container names (you may have to scroll right to see it).
Or we could see the PHP version:
docker exec -it moodle-docker-webserver-1 php -v You can change containers’ names too...
Docker Compose
The “moodle-docker” repo is not a single Docker image. Rather, it is a collection of images that are coordinated to run concurrently, as if they were, in fact, a single image. The logic of multiple images is that each one can spin up a separate process or family of processes that are functionally distinct (You can also read more about the benefits of coordinating containers in this reddit discussion). For example, if you are interested in testing different versions of PHP, it makes sense to containerize PHP separately from other processes like Apache or MySQL.
Use Docker Compose to weave multiple containers into one functional app.
The software responsible for this coordination is Docker Compose, a distinct program from the basic Docker image/container generation tool. The distribution of containers in Docker Compose is organized by a central configuration file: the “docker-compose” file. It is a .yml file tells Docker Compose which containers to run simultaneously and which specific settings to apply to each. The docker-compose file a is distinct from the “dockerfile” that governs the creation of individual Docker images. The first line in the docker-compose file specifies the version number. The lines under “services” contain specifications for which containers should be spun up and how.
Prerequisites
A couple things you might need to get the most out of this tutorial:
-
2GB of free space for Docker Desktop (for Mac installation)
-
Knowledge of the command line interface / terminal, as you'll see code like this:
code code

                                            code
                                            code code code
                                            code code
Docker Installation and Setup Instructions
Okay, let's get down to business.
1. Install Docker and Docker Compose
Install Docker Desktop
We will install both Docker and Docker Compose through "Docker Desktop". As discussed in the introduction, Docker creates images and spins up containers, while Docker Compose coordinates multiple running containers. You can download both through Docker Desktop, which also provides a desktop GUI for interacting with your images and containers. It’s not actually necessary to use the GUI though. We won’t use it in this tutorial, but just know it’s there if you want to be able to see everything in one place.
-
Download the file: Note that if you’re Mac is M1 or M2, you’ll need to choose the "silicon" option:

There are two different options for Mac OS.
-
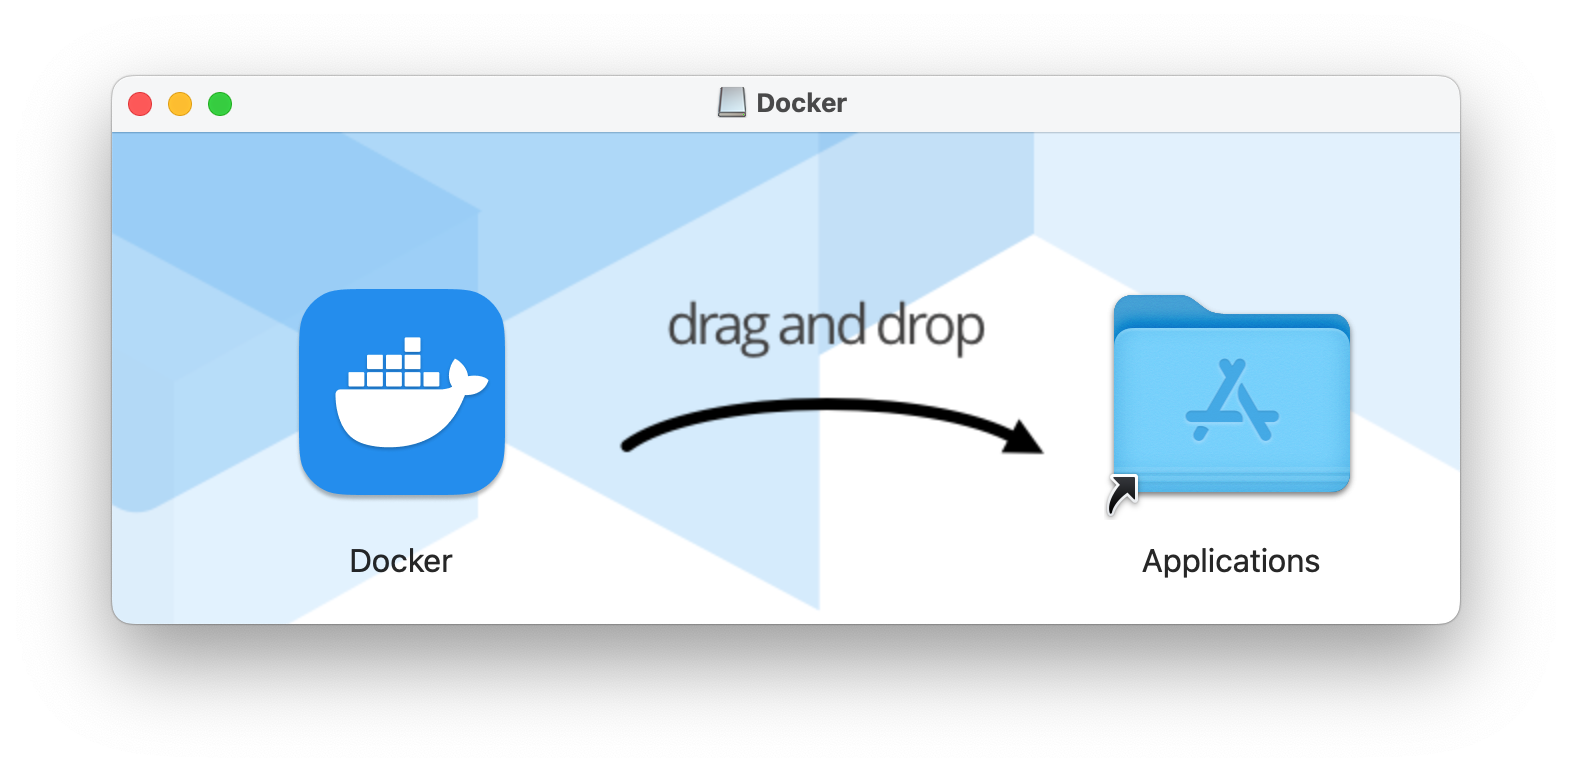
Open Docker: After you drag and drop the Docker icon into the Applications folder, you can open Docker from there.
-
Use “Recommended Settings”:

-
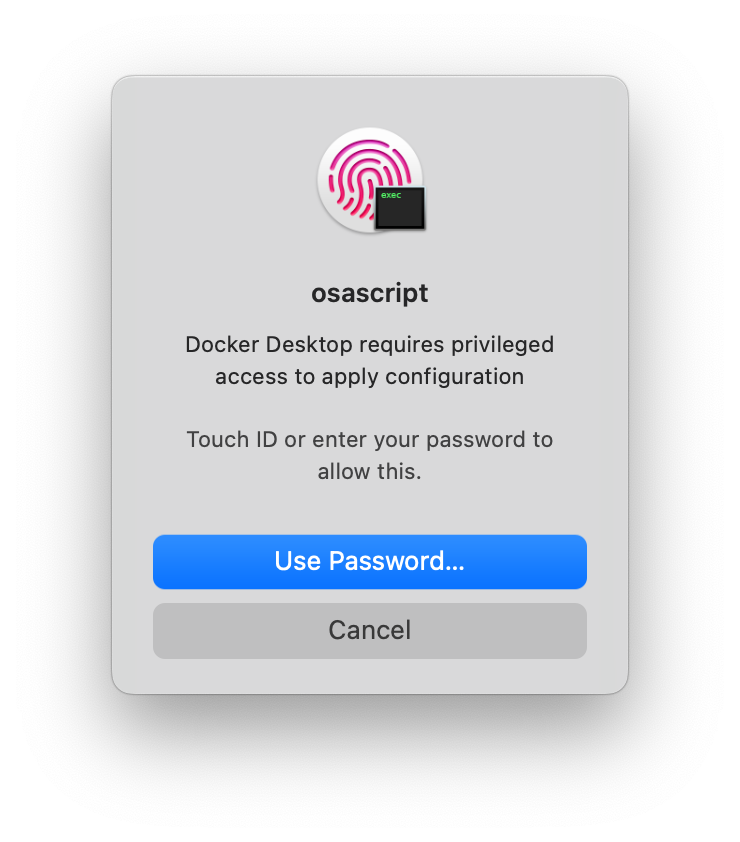
Allow Osascript permission if prompted.
2. Clone GitHub Repo
Choose a GitHub Repo
While you can create your own docker-compose file, it’s much easier to borrow one that’s already made. In this tutorial, we’ll use an official one from MoodleHQ. You can find it on the MoodleHQ GitHub page.
You can find other good examples from:
Clone the Repo
Copy the URL of the repo:
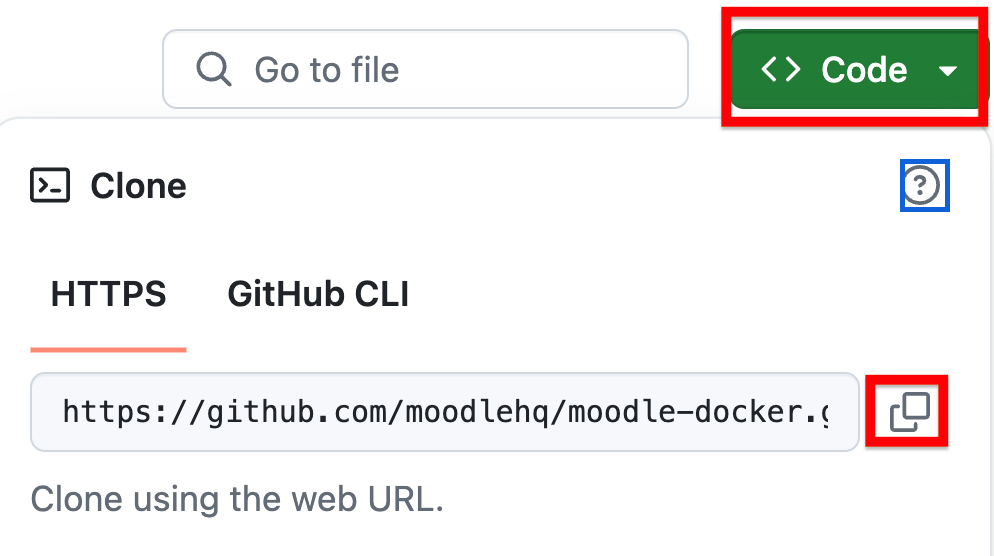
and clone it to your machine:
git clone https://github.com/moodlehq/moodle-docker
...and enter that directory:
cd moodle-docker
3. Define Environment Variables
We will need to at least two environment variables that will be used in the Moodle config.php file (to be created in step 5): MOODLE_DOCKER_WWWROOT
and
MOODLE_DOCKER_DB.
You can set them as the values in the MoodleHQ “quick start” guide from the command line with:
export MOODLE_DOCKER_WWWROOT=./moodle
...and...
export MOODLE_DOCKER_DB=pgsql
...specifying a pgsql database. If you would like to use a different type of database, you can do so. You’ll notice that the “moodle-docker” repo has various .yml configuration files that start with “db.” One of these files is included in the general, “base.yml” file depending on the environment variable selected.
You can check to make sure that they are set. For example:
echo $MOODLE_DOCKER_WWWROOT
...might return:
./moodle
Also, if you are using the default port 80 for something else on your machine, you can specify another port. For example:
export MOODLE_DOCKER_WEB_PORT=8000 4. Clone Moodle Code
The moodle-php-apache Docker image does not actually contain Moodle, rather only versions of PHP and Apache that are configured for Moodle. Therefore, we’ll need to install the Moodle code from Git as we might do in a “normal”, non-containerized install:
git clone -b MOODLE_403_STABLE git://git.moodle.org/moodle.git $MOODLE_DOCKER_WWWROOT 5. Create "config.php"
Next, we’ll need to create the main configuration file for Moodle. This is called config.php. The moodle-docker GitHub repo has a template config.php file with some default settings. We will just make this template the official config.php file:
cp config.docker-template.php $MOODLE_DOCKER_WWWROOT/config.php The template file plugs in environment variables for the Moodle database:

Environment variables get plugged into config.php
Which, in turn, are defined in the base.yml file of the repo:

Environment variables are defined in base.yml
(Recall that we defined at least two of the environment variables manually in step 3.)
6. Create "moodledata" Volume
It’s important to understand that when you shut down a Docker container, all files that were created after its creation will be lost. You have three options:
First, you could simply never shut down containers (you could “stop” them though). This is potentially resource-draining though. There's also the danger of accidentally shutting down a container. Second, you could “Commit” the changes made to the container, which will save the state of the data in the container by building a new image. This has a few downsides though in that:
- If you have lots of valuable data created in a container, it’s not easily used by other processes.
- If you have multiple “committed” containers, data will be duplicated, which is not efficient.
- From a "version control" perspective, it's quite opaque. The differences between commits will not be immediately apparent until they are loaded again.
The third, and usually preferable, option is to create a "volume,” a linked directory on your machine. Volumes are preferable to duplicating a container with docker commit or here (but not recommended, also here).
To create a volume, I added a moodledata volume to the MoodleHQ base.yml (the default upon start-up):

Creating a volume for "moodledata" in moodle-docker's base.yml file
However, when dealing with persistent data in Moodle, it's not so simple. The problem with just a simple moodledata volume is that when containers are destroyed, the next time they are created, the moodledata volume will be out of sync with the database (for example, the database won’t know that there is a created course in the moodledata directory). You could also recreate the changes in the database every time you build the container from the image in a form that mirrors the changes to the moodledata directory (i.e., you could run MySQL commands using the “exec” command in the moodle-docker-compose container). This would be cumbersome though. The preferable solution would be to persist the database in a volume, as well:
In any case, if you are just launching a test instance for some quick testing and don’t need to worry about persisting data, then you don’t have to worry about any of this. In my opinion, the complexity in persisting data is an argument for not using Docker for production instances of Moodle.
7. "Spin Up" the Compose App
We can launch it with the “moodle-docker-compose up -d” command:
bin/moodle-docker-compose up -d
The moodle-docker-compose command is just a wrapper for the “docker-compose command.” The Docker site has more info on docker compose up, if you're interested. You can see that “docker-compose is executed as the last line of the script at:/bin/moodle-docker-compose.cmd while calling the base.yml file (line 21). The -d flag runs containers in the background (without showing streaming logs).
Upon running moodle-docker-compose up -d, you’ll see:

Output of moodle-docker-compose up -d
You can see the images running with:
docker compose ls...or in Docker Desktop GUI under “images”.
One thing to note is that if you are installing Docker on a Linux machine, you might see this error:
$MOODLE_DOCKER_WWWROOT is not set or not an existing directory
If so, either make sure that $MOODLE_DOCKER_WWWROOT is set as an environment variable. You can check it is specified with:
echo $MOODLE_DOCKER_WWWROOTPerhaps your user has not been added to the “Docker group”. You can find more about managing Docker as a non-root user on the Docker site.
Also, if you are running an Oracle or mssql database image, you may need to run:
bin/moodle-docker-wait-for-db…before running moodle-docker-compose up -d.
However, this shouldn’t be necessary if you are using a pgsql database image, as is the case in MoodleHQ’s quick start guide and what we have specified in this tutorial.
8. Install Moodle at "localhost"
Now, if you open your web browser and navigate to localhost, you’ll see the interactive Moodle installation screen. Moodle installation will proceed automatically, and you will be prompted for details regarding database configuration.
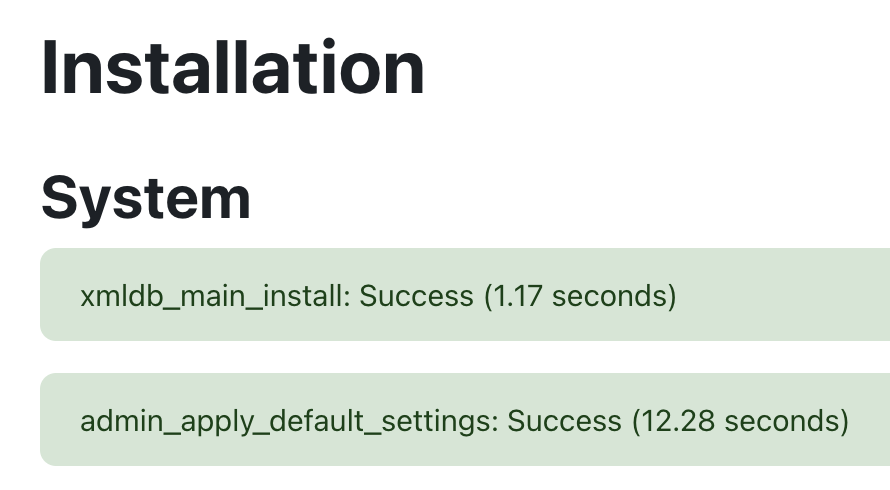
The typical Moodle browser installation
If you want to automate all of the database setup details, you can give answers to these questions in advance by providing them arguments when running the install_database.php script before running the moodle-docker-compose up command: MoodleHQ gives this example on Github:
bin/moodle-docker-compose exec webserver php admin/cli/install_database.php

                                        --agree-license --fullname="Docker moodle" --shortname="docker_moodle"

                                        --summary="Docker moodle site" --adminpass="test" --adminemail="admin@example.com"
For more details on this checkout the "use containers for manual testing" section of the moodle-docker documentation.
In this case, when you run moodle-docker-compose up, and visit "localhost", Moodle will be ready to go!

Sweet success!
If you specified another port in the environment variables step, you can access the installation screen at localhost:[portnumber].
9. Shut Down your Containers
Docker containers can be resource-intensive processes, so may want to be able to shut them down. There are two relevant commands here:
bin/moodle-docker-compose stop
...and...
bin/moodle-docker-compose down
(There's an overview of these two commands in the moodle-docker documentation.)

Shutting down containers
There’s a big difference between the stop and down commands: stop will maintain your containers.
Importantly, down will destroy them!
To put it simply, “stopping” your containers will free up RAM and processing capabilities on your machine, but it will not free up the space taken by the containers because they will still exist in their dormant state.
Shutting the containers down, on the other hand, will erase the containers completely, freeing up space on your hard drive.
Shutting down containers will erase all data associated with them that was not captured by the original image, while stopping them will not.
Check out this discussion about up/down/stop/start for a more detailed discussion.
Conclusion: Docker is Not a Magic Bullet
It may be worth adding Docker to your toolbox, especially if you are doing lots of testing. However, it’s not a magic bullet. Importantly, containerization does not increase the resources of your system. If anything, the overhead of the Docker software will slightly decrease performance, if anything. Also, Moodle isn’t a platform that automatically benefits from horizontal scalability, which is really Docker’s forte. For example, some pretty seasoned folks in the Moodle forums (e.g., this Moodle forum discussion), don’t really see too many reasons have your production Moodle site containerized.

This image, entitled "Traffic signs in Singapore: Slow down sign",
by CEphoto, Uwe Aranas, is licensed under a CC BY-SA 3.0 DEED license.
Also, Docker carries potential downsides, as well. Aside from the data persistence issues mentioned earlier, it adds a layer of complexity to your Moodle deployment, which one could argue is not great on principle. This is also not a small thing in practical terms, especially if you want to recruit other people to work with you on your project. Especially, if you’re doing the self-hosted thing, simplicity is good. Also, Docker technology is much more recent than LAMP (2013 vs 1995), which means there are going to be some people out there who aren’t too familiar with it. Many more people are comfortable with basic LAMP. Also, for really thorough performance testing where you want to run different architectures, you’ll probably want to use a virtual machine (i.e. you want to test how your site runs on Windows, but your host system is Mac or Linux.) Also, VMs might be better if security is really an issue because they offer more isolation of processes than containerization. If you're interested, you can read more about the respective advantages of containers vs VMs on RedHat.com or in this Reddit forum.
Finally, while it’s not really a problem with Docker itself, you can get into trouble if you aren’t careful about the images that you’re using to make your containers. All-in-one solutions like Bitnami or Softaculous solutions are probably not the best for production when it’s time for upgrading as you become dependent on these companies to release new images. There are Moodle forum discussions about this here and here.
Good luck!
