Installing Moodle 4.4 on Ubuntu Server
This tutorial walks your through installing Moodle 4.4 for Ubuntu Server. Topics covered include downloading Moodle install files from Git, Apache installation, PHP installation, MySQL database setup, and getting a PHP cron script ready to schedule routine admin tasks. This tutorial is more current than the existing "Moodle for Ubuntu" article on Moodle.org.
This is a setup for Ubuntu Server 22.04 and Moodle 4.4.
Installing Moodle Can Be Confusing!
While Moodle is a favorite of small institutions or indivdual online educators, Moodle installation can be confusing for those who do not have web developement experience. This tutorial aims to make Moodle installation more accessible to educators who are not experienced web developers.
What's so tricky about setting up Moodle? There are several ways to go about it, even on one platform. There are also many different platforms/hardware setups. Moodle's documentation often offers broad and/or differing installation procedures. Often this is due to the fact that users have many different types of systems, but overall this can make the documentation more difficult for beginner users. On the contrary, this tutorial assumes that all users are coming in on the same system: a blank installation of Ubuntu Server 22.04. This entails slightly less flexibility, but it hopefully should make the installation process a lot simpler for beginners! Also, sometimes they can be a bit outdated in terms of versions of Moodle and PHP used. Also, the Moodle documentation is written for seasoned web developers. One of the purposes of this article is to explain the instructions in a bit more detail, so that educators with less experience in back-end web development can set up their own Moodle instance with less frustration.
"Why Ubuntu Server?"
Ubuntu Server is a great operating system for those of us self-hosting Moodle for the first time.
First of all, it's the Linux distro that the most people use to host websites.
This is due to its stability and security (it provides regular updates and security
patches), extensive
community support (there are tons of tutorials and troubleshooting forums online), and its ease of installation.
Prerequisites
- A server running a recent version of Ubuntu Server (we are using 22.04 in this tutorial)
- SSH (Secure Shell) access to your server
-
Basic familiarity with linux commands for navigating around your web server
For example, you'll need the
cd,ls, andnanocommands to navigate to Apache configuration files:cd /etc/apache2 ls nano apache2.confWe've got a tutorial on these basic Linux commands if you need it!
Installation Instructions
1. Install Apache Server
To begin the installation, first access the command line of your server. If you are using a remote server, you can log on via SSH.
Before doing anything with Moodle, we'll need to set up web server capabilities on your machine.
First, if you check, you'll see that the Apache2 server software is not installed:
apache2 -v

You can check to see if Apache is installed
You can install it from the "apt" package library:
                sudo apt update
                  sudo apt install apache2
("sudo" is neccesary because you need root access to use the apt commands)
When it's correctly installed, the version check should show something like this:

Checking the Apache software version
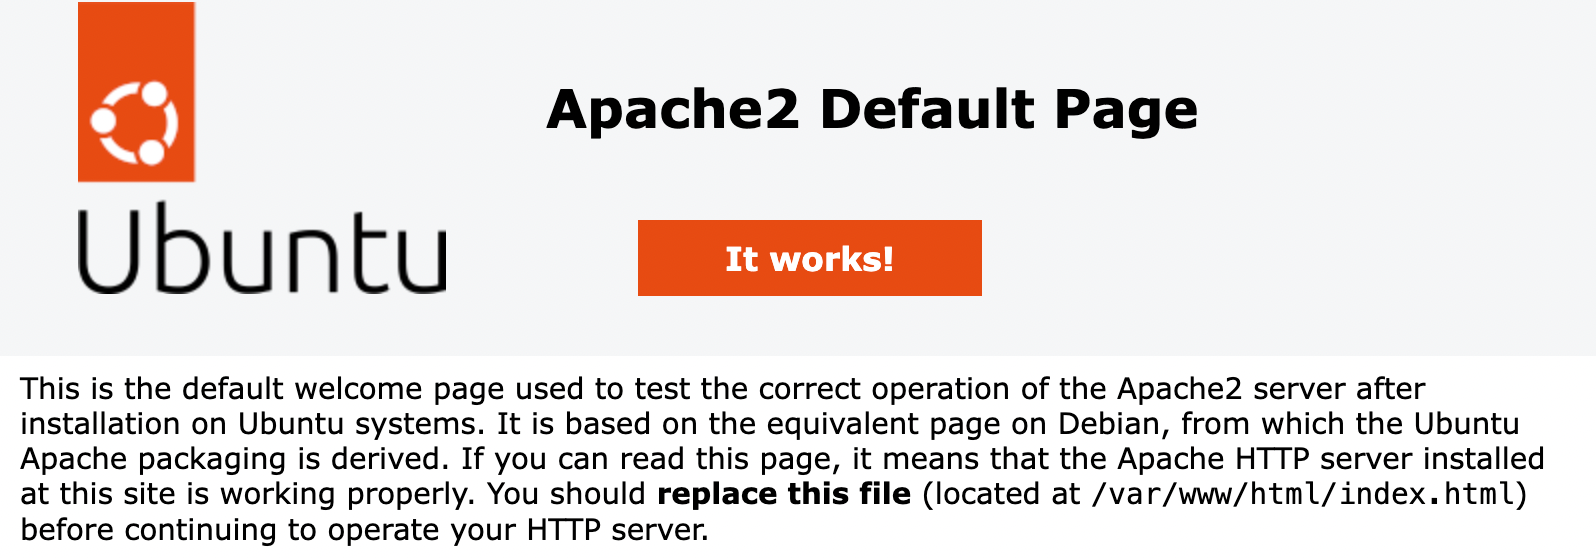
Now, if you visit the IP address of your server in a web browser, you should see the Apache splash page!

You can check to see if Apache is installed
If you don't know the IP address of your server you can simply enter:
hostname -IAlternatively, if you enter:
ip addr...you will see a list of your ethernet interfaces. Look for the one that specifies "BROADCAST." It will probably be labeled as "eth0", "enp0s1", etc. The interface labeled "lo" is your "loopback" interface and is only accessible from your local machine.

You can find your outward facing IP address
`
2. Install Moodle Files
Now, let's change to the webroot directory on our server:
cd /var/www/htmlThis is a directory that is accesible to the outside world (i.e., to visitors to your LMS site). This is where we will download the Moodle files to. We will create this directory in a conventional place: at /var/www/html
You can download the most recent stable release from git.moodle.org
You can alternatively just download the normal Moodle files, but using Git is advantagous because it makes it easy to upgrade to the next major release. Moodle has dedicated documentation for details of this installation method.

We will download Moodle using Git
...and we can "clone" the Moodle git repository from "moodle.git":
sudo git clone git://git.moodle.org/moodle.git It may take a few minutes to download the full git repository.
If we change to the "moodle" directory that should now be available...
cd moodleWe can see that there is a branch for each available Moodle version:
git branch -a(You can exit out of the display with 'q')
If you see this error:
fatal: detected dubious ownership in repository at '/var/www/html/moodle'...you can add an exception for this directory:
git config --global --add safe.directory /var/www/html/moodleLet's track the 4.4 stable release:
sudo git branch --track MOODLE_404_STABLE origin/MOODLE_404_STABLE...and check it out:
sudo git checkout MOODLE_404_STABLEWe can change the owner of the moodle directory to a user with root access privilages (i.e., "sudo" privaleges) and the group of the directory to the web server group (i.e., www-data)
sudo chown -R [username]:www-data /var/www/html/moodleHowever, make sure that the web files are not writable by the web server user group! For example, the default permission set, "755", will allow only the owner of the directoy to have write access. You can see the current permission with:
ls -l("(d)rwxr-xr-x" is the same as 755)
If the permission set has been changed, you can reset it with:sudo chmod 755 /var/www/html/moodle More info about permissions and ownership:
3. Installing PHP
The basic server software used for hosting most web services is refered to as the "LAMP" bundle:
- Linux: The operating system (i.e., Ubuntu)
- Apache: Web server software
- MySQL: Database server
- PHP: General-purpuse scripting langauge used for web development
Most LMS installations will require these elements as required software.
Moodle is written in the PHP language, so you'll need to download the PHP interpreter. We need to install the appropriate version of PHP. For example, Moodle 4.4 requires you to have PHP 8.1 installed on your server. We also need to install the respective PHP extensions, as well.
If you're installing an older version of Moodle, you may need to use an older version of PHP, as well. For example, I got an "error/generalexceptionmessage" when going to my new moodle URL. This was caused by my PHP version being too recent (for example, see this post on the Moodle forum). You may need to downgrade your version of PHP. You can check PHP compatability here.

(https://moodledev.io/general/development/policies/php)
You can download Ubuntu's current version of PHP, the PHP Apache module, and the PHP command line interface (CLI) with:
sudo apt install php libapache2-mod-php php-cli
(as per the instructions on the official Ubuntu website.)
Here's where you can find what version of PHP you need for your version of Moodle.
If you want the most recent version of PHP for Ubuntu, it may not be currently available in the general "apt" package repository (due to a "feature freeze" ), so you will need to download it from a 3rd party repository:
sudo add-apt-repository ppa:ondrej/php
Although this is a 3rd-party repository, Ondrej is a widely-trusted developer for Ubuntu PHP packages. He has been writing and maintaining PHP packages for Ubuntu for many years. Therefore, press return/enter when you are prompted to continue at a warning prompt.
Now let's install the PHP 8.2 Apache plugin and PHP 8.2 for the command line interface:
sudo apt install php8.2 php8.2-cli
You can learn more about the difference between these PHP versions here or here. Note that your command line PHP version is not the same thing as the PHP version of your Apache module.
Next, you'll need to make sure that all of the required PHP extensions are installed on your server. You can see which are already installed with:
php -m
The "-m" flag is for "modules," which are the same thing as extensions.
Here's how you can install the extensions that are not included automatically with PHP:
sudo apt install php-curl php-xml php-gd php-intl php-mbstring php-mysqli php-soap php-xmlrpc php-zip
If you need them for a specific version of PHP, you can include the version number like this:
sudo apt install php8.2-{curl,curl,gd,xml,mbstring,mysqli,intl,soap,xml,xmlrpc,zip}
Some notes regarding the individual extensions:
-
The "dom" extension is included in "xml" extension.
-
We are installing the MySQLi extension because that it corresponds to the MySQL database type that we will be using. In PHP, MySQLi functions allow you to access MySQL database servers. Beware of older documentation that right recommend installing the (now depricated)
php5-mysqlextension. -
The curl extension allows you to execute curl commands in Moodle. For example, here.
-
The mbstring extension allows PHP to parse multibyte strings.
Restart the apache server after installation:
sudo service apache2 restart
4. Setting Up MySQL Database and "moodledata" directory
Next, we'll need to download the php database server. This is where Moodle will store user info:
sudo apt install mysql-server
Once it's installed, you can check its status:
sudo service mysql status
Log in to MySQL using root privalages:
sudo mysql
Create a database user and a corresponding password:
mysql> CREATE USER 'lmstutorials'@'localhost' IDENTIFIED WITH mysql_native_password BY 'test';
For example, here, my username is "lmstutorials" and my password is "test" (not a good password for actual use!)
Now, grant that user all privalages:
mysql> GRANT ALL PRIVILEGES ON *.* TO 'lmstutorials'@'localhost';
Next, log out of MySQL (with "exit" command) and then back in as the new database user:
mysql -u [username] -p
You will then create a database called "moodle" with a utf8mb4 character encoding:
mysql> CREATE DATABASE moodle DEFAULT CHARACTER SET utf8mb4 COLLATE utf8mb4_unicode_ci;
This encoding gives you lots of flexibility to include foreign language characters in the data of your Moodle instance.
You can type quit to leave the mysql command line.

MySQL is active
Next, we need to create a directory where Moodle can store files. This is the "moodledata" directory. We can create this in our "var" directory like this:
sudo mkdir /var/moodledata
You can call this directory whatever you like and place it anywhere (except in your webroot directory --
don't do this, for security reasons), but calling it
moodledata is a convention.
Change the owner of the directory to www-data.
This is the name of the web server user in Ubuntu.
In other words, this allows the Apache web server to write to this directory (for security reasons, we wouldn't want the web server to write to every directory by default).
sudo chown www-data:www-data /var/moodledata
Grant read, write, and execute permissions to the www-data group (this is why we don't want to have this folder in the webroot):
sudo chmod 0770 /var/moodledata
If the permissions are not set correctly, you may get a "PHP permissions" error .
5. Installing and Configuring Moodle
Before you install Moodle, make sure to change "max_input_vars" to a value of at least 5000 in both /etc/php/8.2/apache2/php.ini and /etc/php/8.2/cli/php.ini (don't forget to remove the semicolon comment before the current default). (you can use control + w to search for it; it's a long file!) Change "8.2" to the PHP version you are using.

Change "max_input_vars" value
When you download the Moodle files, there is no config.php file. This is the main configuration file that holds important information like the username and password that Moodle will use to access the database, as well as the locations of the webroot and data directory. There are a few ways to create the config.php file in the Moodle folder:
- First, you can copy the "config-dist.php" file and name it "config.php". Then you can manually enter the required info.
- Second, you can follow a similar guided install on your web browser by navigating to your Moodle webroot. There, you will find the step-by-step configuration workflow.
-
Finally, you can run the install.php script and follow the directions:
cd /var/www/html/moodle/admin/cli
                sudo php ./install.php
In this tutorial, we have chosen the last option.

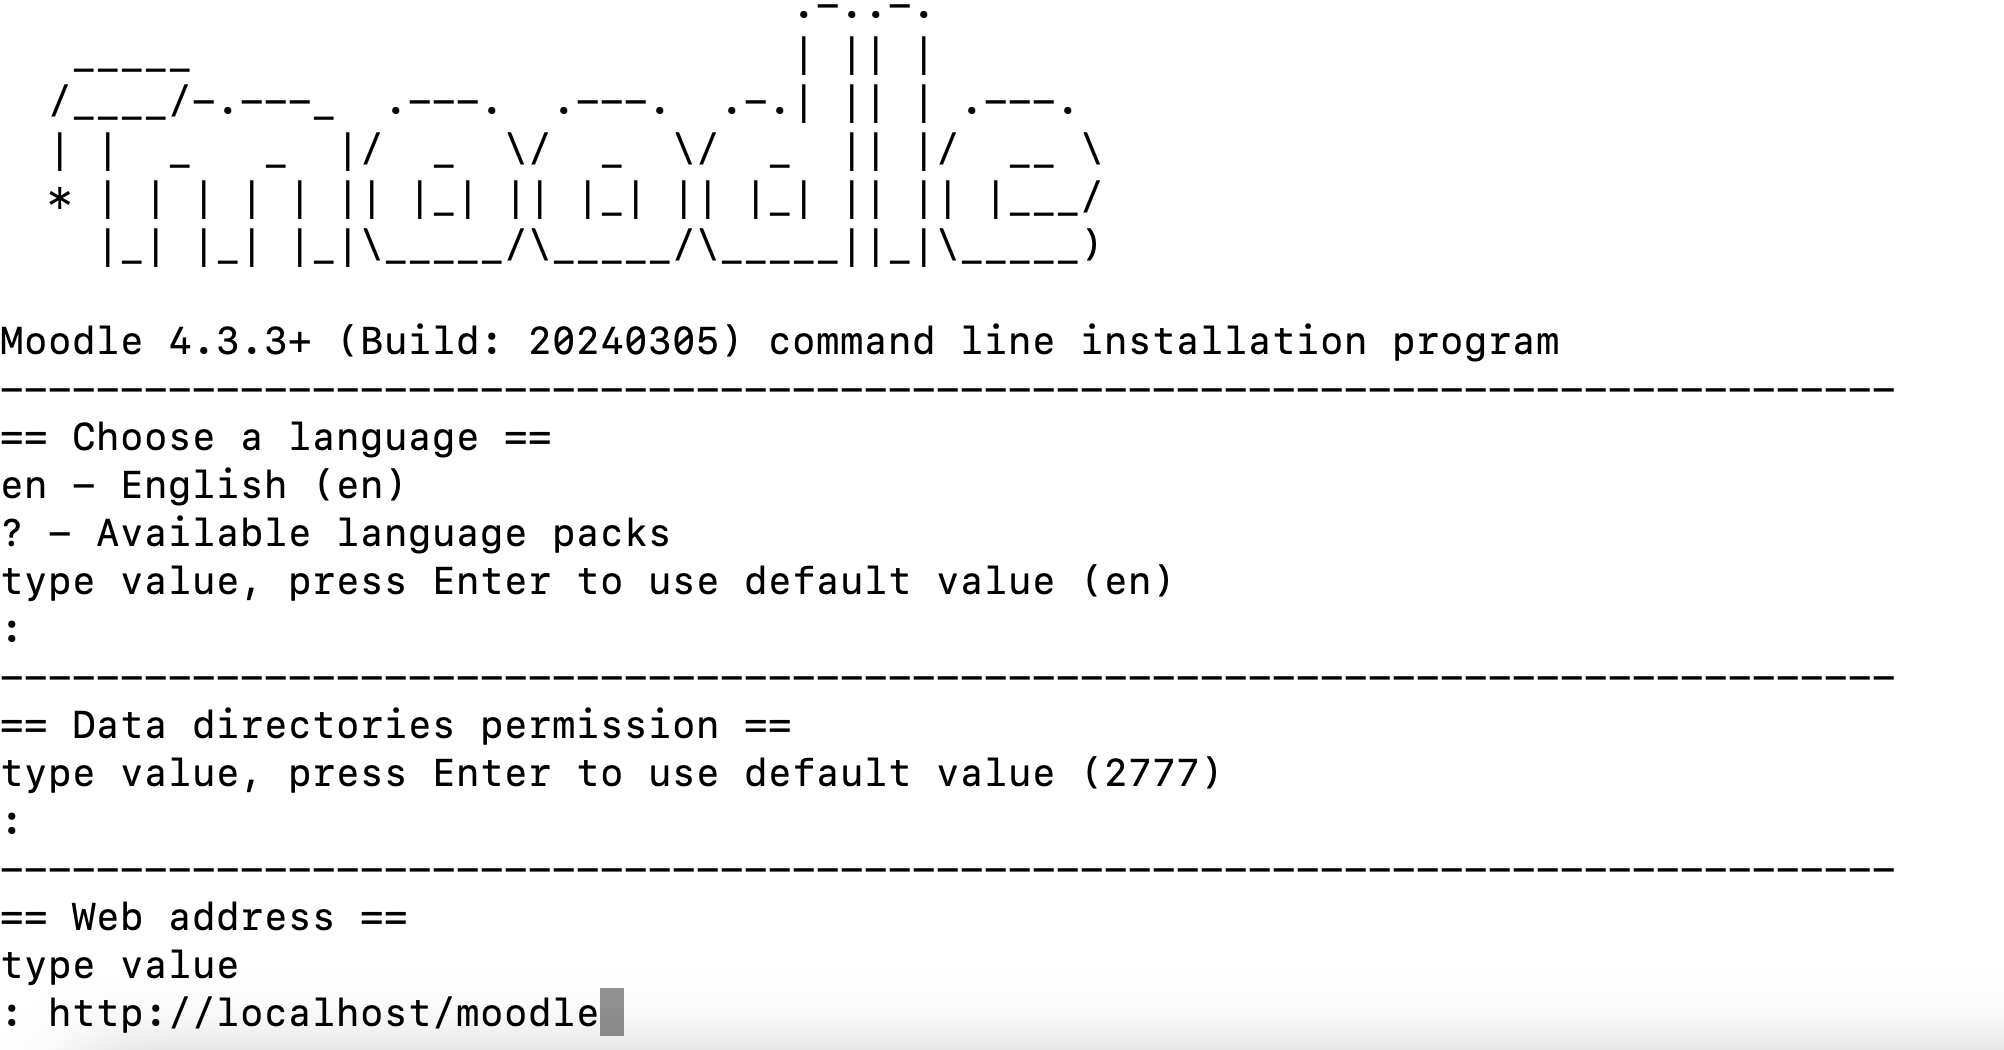
Moodle Guided Install Screen
For the webroot, specify your fully-qualified domain name. In this example, I am only installing locally so I will add:
http://192.168.64.6/moodleBut you would probably want to add something like:
http://mymoodleinstance.comor
https://mymoodleinstance.comFor the "dataroot," add the path to the moodledata folder you created:
/var/moodledataAs you are using a MySQL database, choose the "mysqli" option for the database in the config file.
If the settings are set correctly, the install process will procede automatically (if you chose the second or third installation option).
If you need to restart this install process, you may need to delete the config.php file in the main moodle directory and start again with the install.php script.
After the installation is complete, you should be able to access your new Moodle instance at your webroot address. You may need to change the permissions of the new config.php file that was created by the installation script (if you chose to install with this method):
sudo chown admin:www-data /var/www/html/moodle/config.phpYou'll want to change the DocumentRoot in Apache to the moodle directory:
in /etc/apache2/sites-available/000-default.conf to "DocumentRoot /var/www/html/moodle"

Moodle Guided Install Screen
Finally, you will need to restart the Apache server:
sudo service apache2 restart6. Setting Up the Cron Script
We're not out of the woods quite yet! We still need to set the Moodle cron.php script to run periodically.

To set up Moodle cron jobs, first you'll need to make sure that the cron utility is installed on your server:
sudo apt install cron
For example, you can see that there are currently no active cron jobs for in your user's "crontab":
crontab -l
(the -l is for "list")
To add a cron job to the www-data user's crontab:
sudo crontab -u www-data -e
Here's a discussion regarding why you should edit the crontab directly.
If you are prompted to choose an editor, we suggest that you select the "nano" option. It is the most straight-foward editor option for linux beginners.
At the end of the file, you can add:
* * * * * /usr/bin/php /var/www/html/moodle/admin/cli/cron.php
You will be using the php binary found in the /usr/bin/php directory to run the cron.php script
found in the cli subdirectory.
Notice that you are running this script with the "Command Line Interface" PHP binary, not the PHP Apache
module.
Therefore, make sure that it is up to data, as well.
The "* * * * *" specifies that the cron.php script should be run every minute.

The www-data crontab
If you wanted to run the cron.php manaully (just to see if everything outside of the crontab is working correctly), you could do this:
sudo /usr/bin/php /var/www/html/moodle/admin/cli/cron.php
You can see that it is working if you enable the option to check the cron via web browser in the site security settings:

Enable viewing the cron in a web browser
...and then visit the moodle/admin/cron.php directory on at your loaclhost URL. For example, for us it is:
http://192.168.64.6/moodle/admin/cron.php
Again you can find your local IP address with:
ip addr
In your browser, you should see:

The cron is working!
Conclusion
Congratulations -- You've installed Moodle on your Ubuntu server! You should now be able to log in to your Moodle instance as the admin user that you specified in the creation of the config.php file.
If you make a mistake or are stuck and want to start over:
- Log into MySQL and wipe the moodle mysql database:
drop database moodle -
Delete the moodle files:
sudo rm -r /var/www/html/moodle -
Delete the moodledata folder:
sudo rm -r /var/moodledata
A logical next step for most people will be to set up email for your Moodle instance. For example, you may want to email students notifications (e.g., for new posts in subscribed forums) or account recovery links for lost usernames or passwords.


