Remote Server Access with SSH
You connect to your server remotely from your local machine using an application called Secure Shell, or SSH. This tutorial walks you through setting this up, as well as creating two handy shortcuts: enabling SSH "key" access and creating a server alias.

Introduction
"How do I connect to my server remotely?"
Unless you are using a home server, you are probably using a VPS, which might be very far away --maybe even in a different country! Therefore, you'll need a way to access it remotely. This is where Secure Shell, or SSH, comes in: it lets you log on to your remote server from your home machine.
"Why SSH?"
Historically, there were other methods which people used for accessing other computers remotely (e.g., Telnet). However, SSH is the preferred method for remote server access because it is so secure. Unlike other traditional methods, SSH encrypts all data exchanged between the client and server using public-key cryptography, safeguarding sensitive information such as passwords, commands, and data transfers from potential eavesdropping or interception. Moreover, SSH is versatile; it enables secure file transfers and even tunneling of other protocols, ensuring a comprehensive solution for remote server management.
Prerequisites
- Root access to a functional server
- Knowledge of some basic linux commands
Instructions
1. Enabling SSH
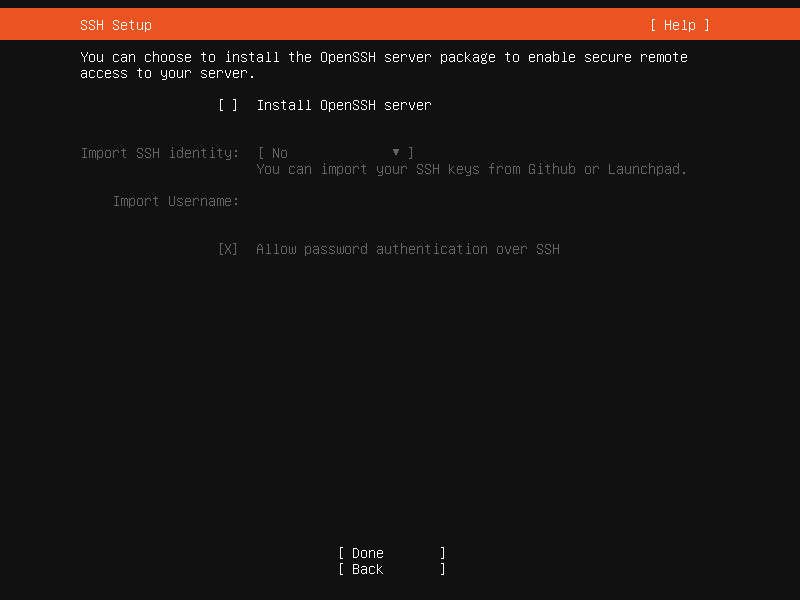
The easiest way to enable SSH access is to install "OpenSSH Server" on installing Ubuntu on your server. You should be prompted if you want to this automatically during the installation process:

You have the option install OpenSSH server along with Ubuntu Server.
If your server is already up and running without SSH access, you can still install OpenSSH Server really easily from the command line:
    sudo apt update
    sudo apt install openssh-server
You can check to see that it is running with:
sudo systemctl status ssh

You'll see something like this if SSH is running properly.
2. Find your IP address
In order to log in to your server remotely, you'll need to know the IP address of the server. I constantly have to look this up because I can never remember it!
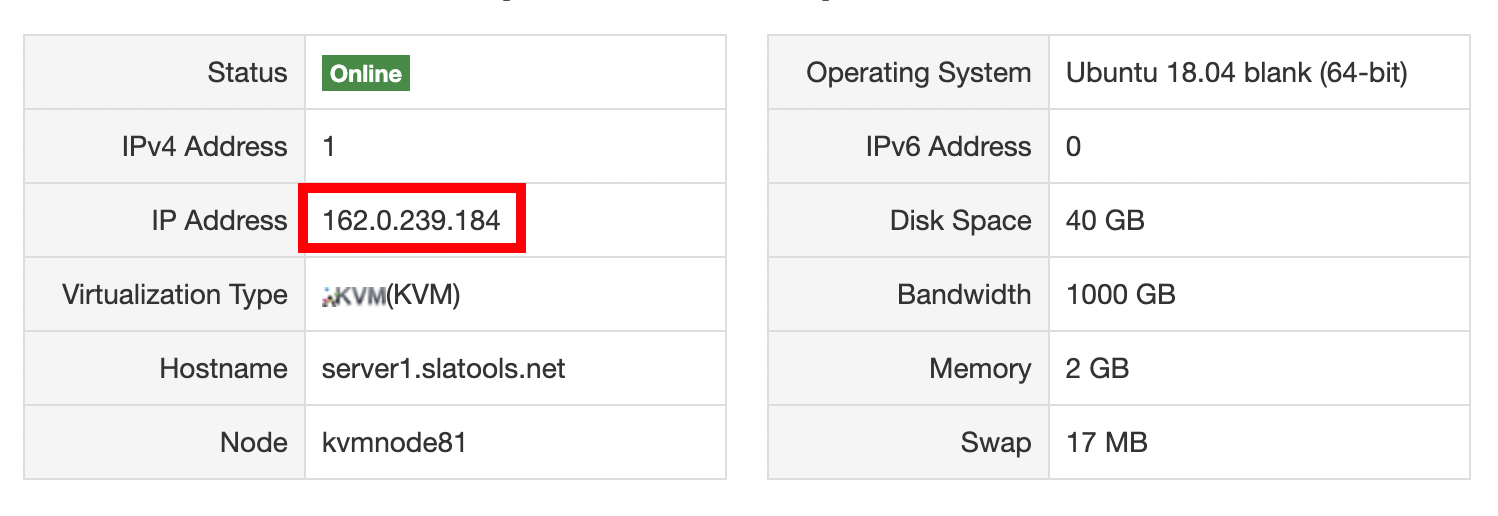
If you're using NameCheap (like I do), from your dashboard, you can go to "Hosting List," and then "Go to VPS Panel:"


You can find your IP address from your VPS provider.
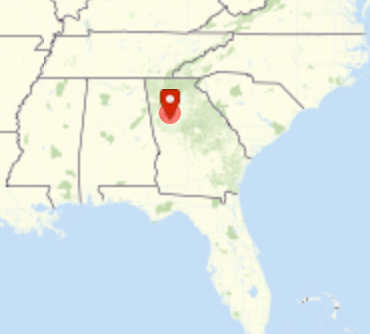
Just for fun, you can look up the physical location of your IP address. My server is actually in Georgia!

It turns out my physical server is in Georgia!
3. Logging in through SSH
Open the terminal. Enter:
ssh [username]@[IPaddress]
... where "[username]" and "[IPadress]" should be substituted for your info accordingly.
You should then be prompted for your password.
WARNING! Do not forget your password or you will be locked out of your server! (Remember, you can't just go knock on the door of the NameCheap serverfarm in Georgia). If you do ever get locked out, you'll have to contact the provider of your VPS, and you might have to start everything over from scratch!
If you have never logged in to the server before (for example, you are trying to access a new VPS), you should enter "root" as the user (at least for Linux and MacOS).
Also, if this is your first time logging in, you may be prompted if you want to continue connecting:

If you do not know your password, log on to the "VPS panel" (if using NameCheap hosting) or the equivalent, and select "Change" under "Root/Admin Password":

Now, log try logging in via the terminal with:
ssh root@[IPaddress]
...and then entering the new password.
You should now be able to log into your server remotely!

This image is adapted from an image entitled, Access Granted, by Adelson Raimundo Reis Amaral,
is licensed under a CC SA 4.0 licence.
If this is your first time logging in and you have logged in as "root", you should add a new user to log in with for the future:
adduser [new_user_name]
You will then be prompted to create a password for the new user.
4. SSH Keys (optional, but recommended)
The best practice for SSH remote access is to enable access with a "key," rather than a password. This means that your local and remote machines each have a special key that allow the computers to recognize and trust each other.
SSH key access improves both security and usability. First off, this means that there is one less password that you need to remember! Also, unlike passwords, SSH keys are cryptographic keys that are significantly harder to crack through brute force or phishing attacks. Additionally, SSH keys eliminate the need for transmitting passwords over the network, reducing the risk of interception by malicious actors.
We'll use a program called "OpenSSH authentication key utility" that comes with all versions of MacOS and Linux. You can run it with the following command:
ssh-keygen
This will generate two keys, a "public" and a "private," and will save them to the .ssh folder in your home directory. The "dot" in the folder name means that it is hidden, you can see it by adding the -a flag to the ls command:
ls -a ~/.ssh
You will see that the private key is named id_ed25519 and the public key is named id_ed25519.pub (ed25519 is a cryptographic standard that is extermely secure and is the default key format generated from ssh-keygen. Feel free to learn more about it, but it's quite a rabbit hole and not necessary for most of us.)
You can copy the public key to your server with the ssh-copy-id command:
ssh-copy-id username@remotehostIP
(where you supply your username and the IP address of your server accordingly)
Now, when you SSH into your server, you can see that the public key can be found in the "authorized keys" file in your home directory:
cat ~/.ssh/authorized_keys
Now, to be really safe, we are going to change the permission of the authorized key file, so that only your user will have "read" and "write" access to it:
chmod 600 .ssh/authorized_keys
The chmod is the commmand for changing file permissions and the 6 means that the file owner (you) can read and write the file. The other two 0s represent the permissions for the "group" and "other" users, specifically that neither has access.
Okay! From now on, when you access the server via SSH, you won't be asked for a password --cool, right?
5. Creating a server alias (optional)
Again, I can never remember the IP address of my server! I like to be able to access the server just by using a memorable nickname. To do this, we can create an "alias:"
On your home machine, use the nano editor to edit ~/.ssh/config
nano ~/.ssh/config
(If that file doesn't exist, this command will create it.)
Enter:
Host [nickname]
    HostName [IP address]
    User [username]
    IdentityFile ~/.ssh/id_ed25519
Control + x should close the nano editor.
Now, you should be able to access your server simply be entering:
ssh [nickname]
...from your home machine. For example, I just use "server" as a nickname.
Conclusion
By following these steps, you've made it possible to connect to your LMS server from anywhere, anytime, securely. You've also learned how to do this using SSH keys and a server alias, which makes life really easy for you moving forward. With remote SSH access, you can now access a server anywhere in the world from anywhere in the world. Congratulations!
References & Further Reading
- The PuTTY SSH client for Windows users.
- OpenSSH Server
- NameCheap documentation
- "Linuxize" article


